Approval Workflows
Folderit approval workflows let you send a file or other supported item to one or more users or groups for a formal decision.
You can start an approval manually for a specific item, use a reusable workflow template, or automate the process. Folder-level approval automation can start whenever a file is added to a configured folder, while the visual workflow builder can also support other triggers and conditions.
Approval can also be combined with other workflow methods. For example, a document can first be approved, then acknowledged, and finally sent for electronic signing as part of one multi-stage workflow.
Workflow steps can run in Parallel, Serial, or Custom order. After successful completion, the item can optionally be moved to another folder, where another workflow or automation may continue the process.
Ways to Start an Approval Workflow
- One-time workflow: Start an approval manually for a specific item.
- Folder-level automation: Automatically start an approval when a file is added to a configured folder.
- Workflow automation: Use the visual workflow builder to start a workflow when its configured trigger and conditions are met.
- Workflow template: Use a reusable workflow prepared by an administrator for a recurring process.
- Custom multi-stage workflow: Combine approval with acknowledgement, review, field completion, electronic signing, or other available methods.
Setting Up Folder-Level Approval Automation
Folder-level automation starts an approval workflow automatically whenever a file is added to the configured folder. The setup process for this type of automation remains available from the folder settings.
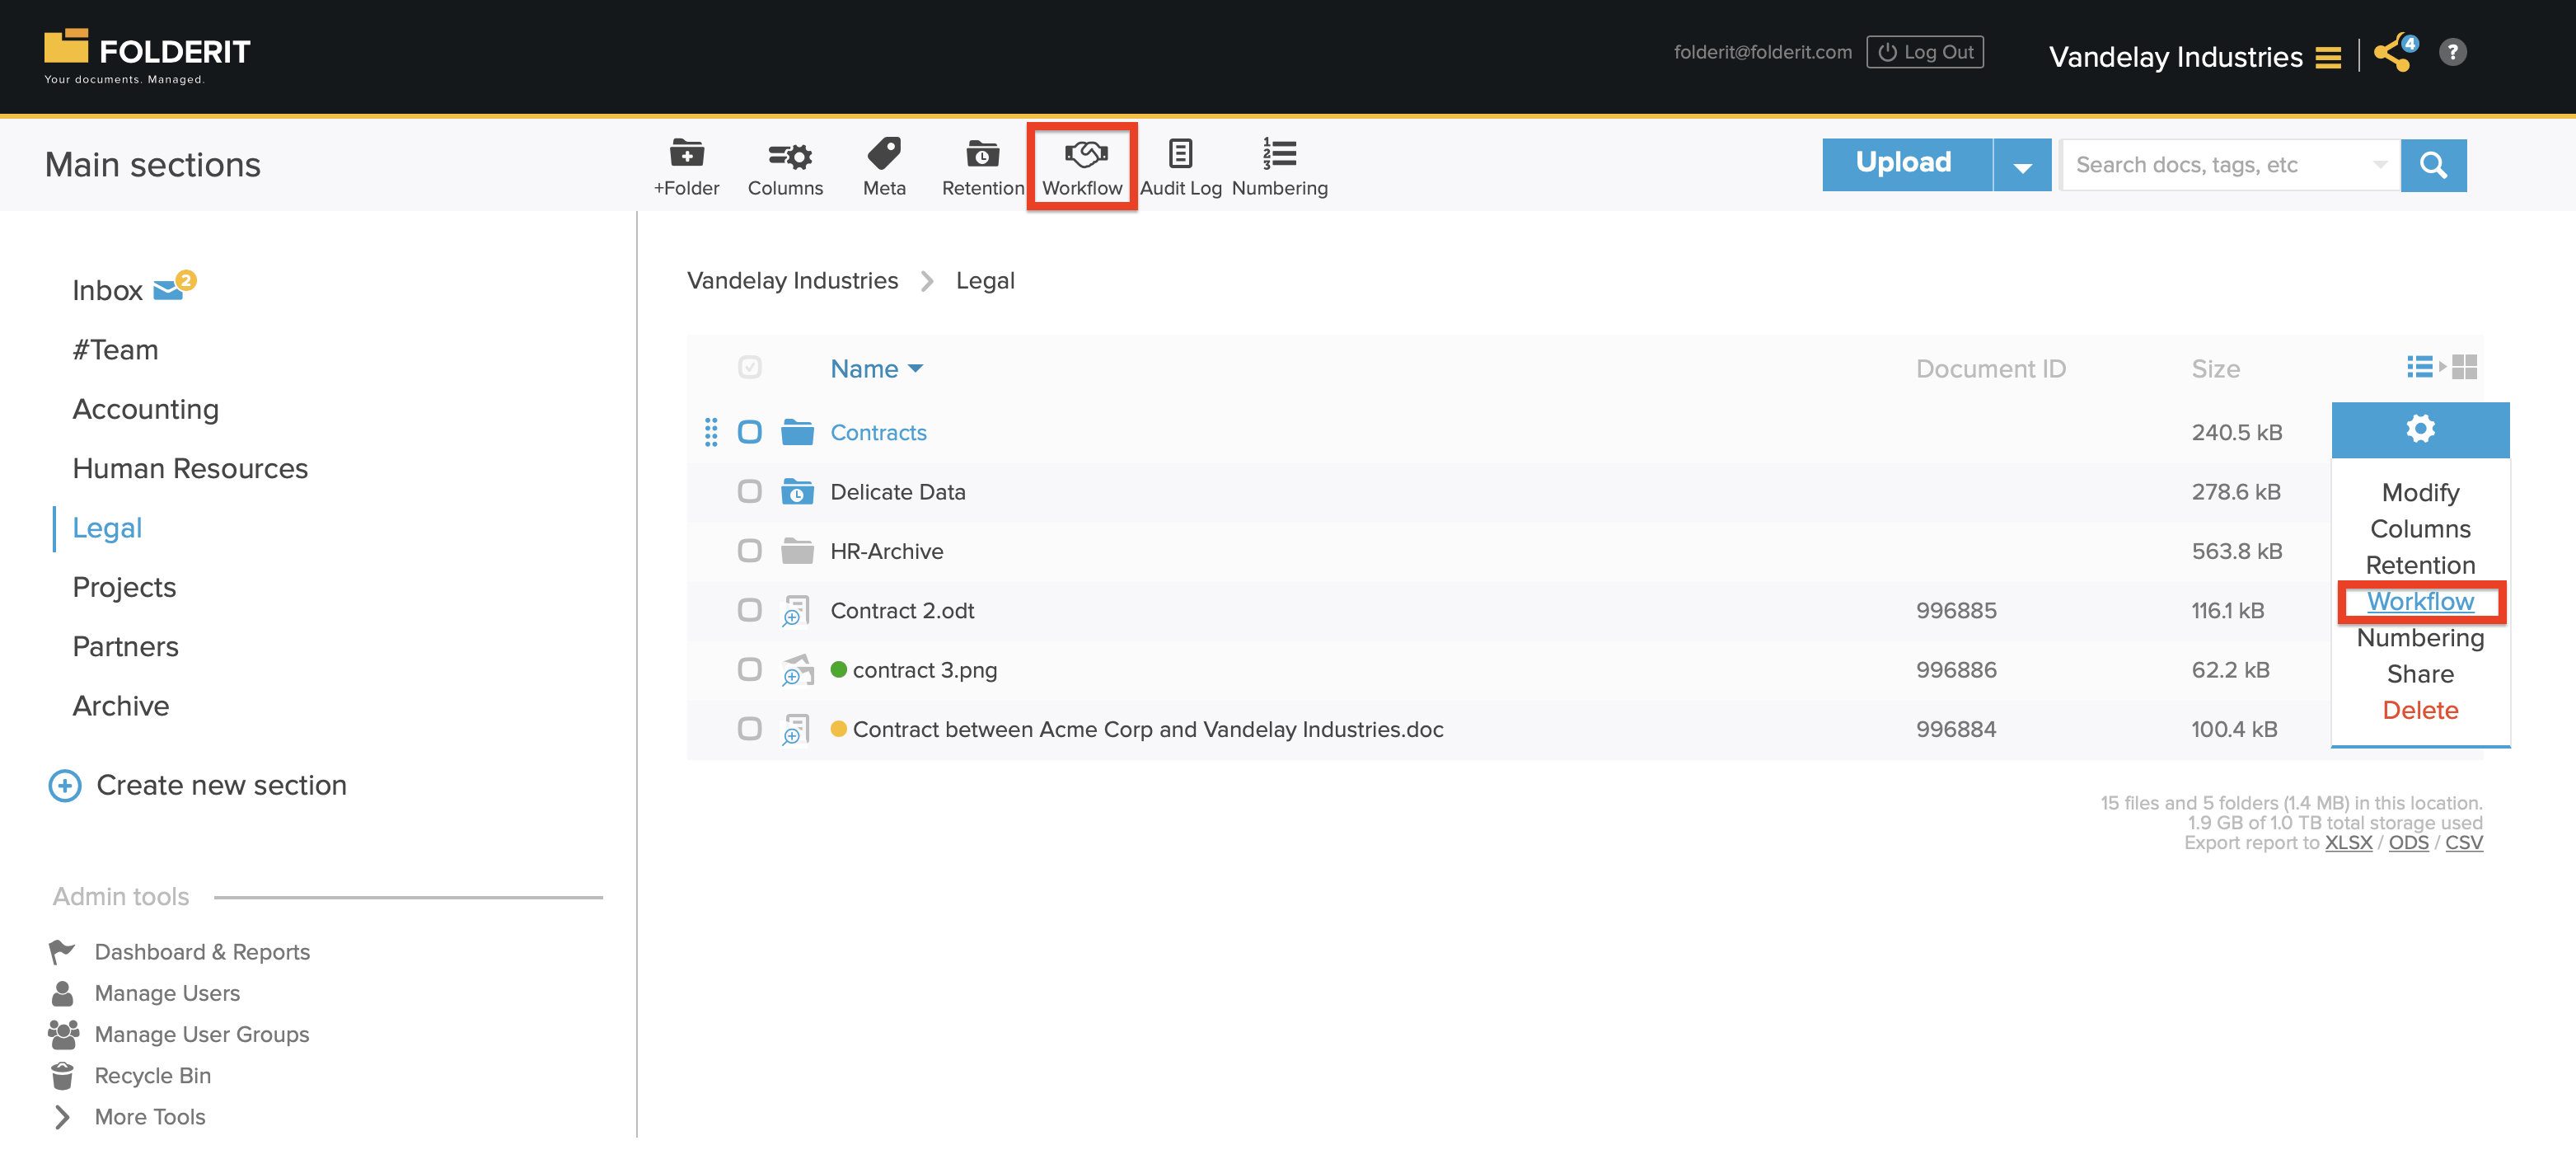
- Locate the folder and click its Settings icon. Choose Workflow in the list view, or click the Workflow button on the toolbar while inside the folder.
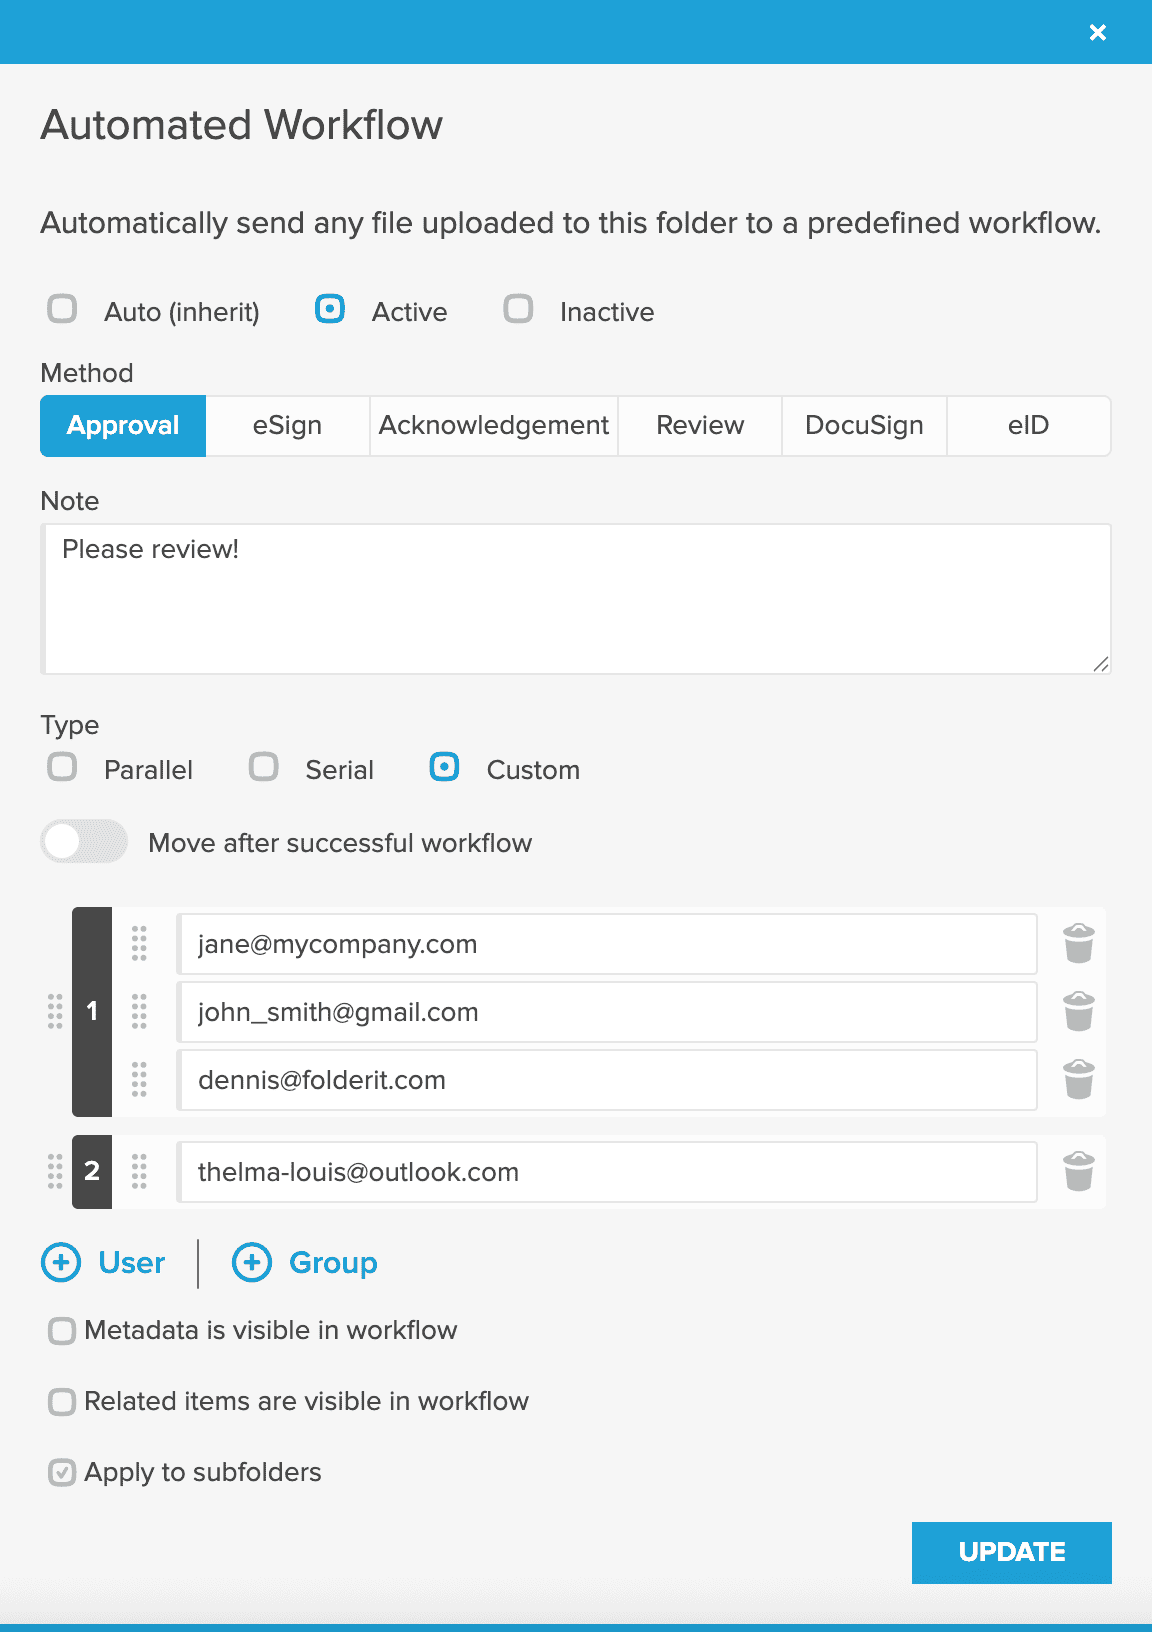
- Click Activate to start configuring the automated workflow.
- Choose Approval as the workflow method.
- Add the resolution text—the statement participants are being asked to approve. For example, “Shall we pay this?” This is optional.
- Choose the workflow order:
- Parallel: all approvers receive their invitations at the same time.
- Serial: approvers receive their invitations one after another in the defined order. The next person is invited only after the previous participant completes their task successfully.
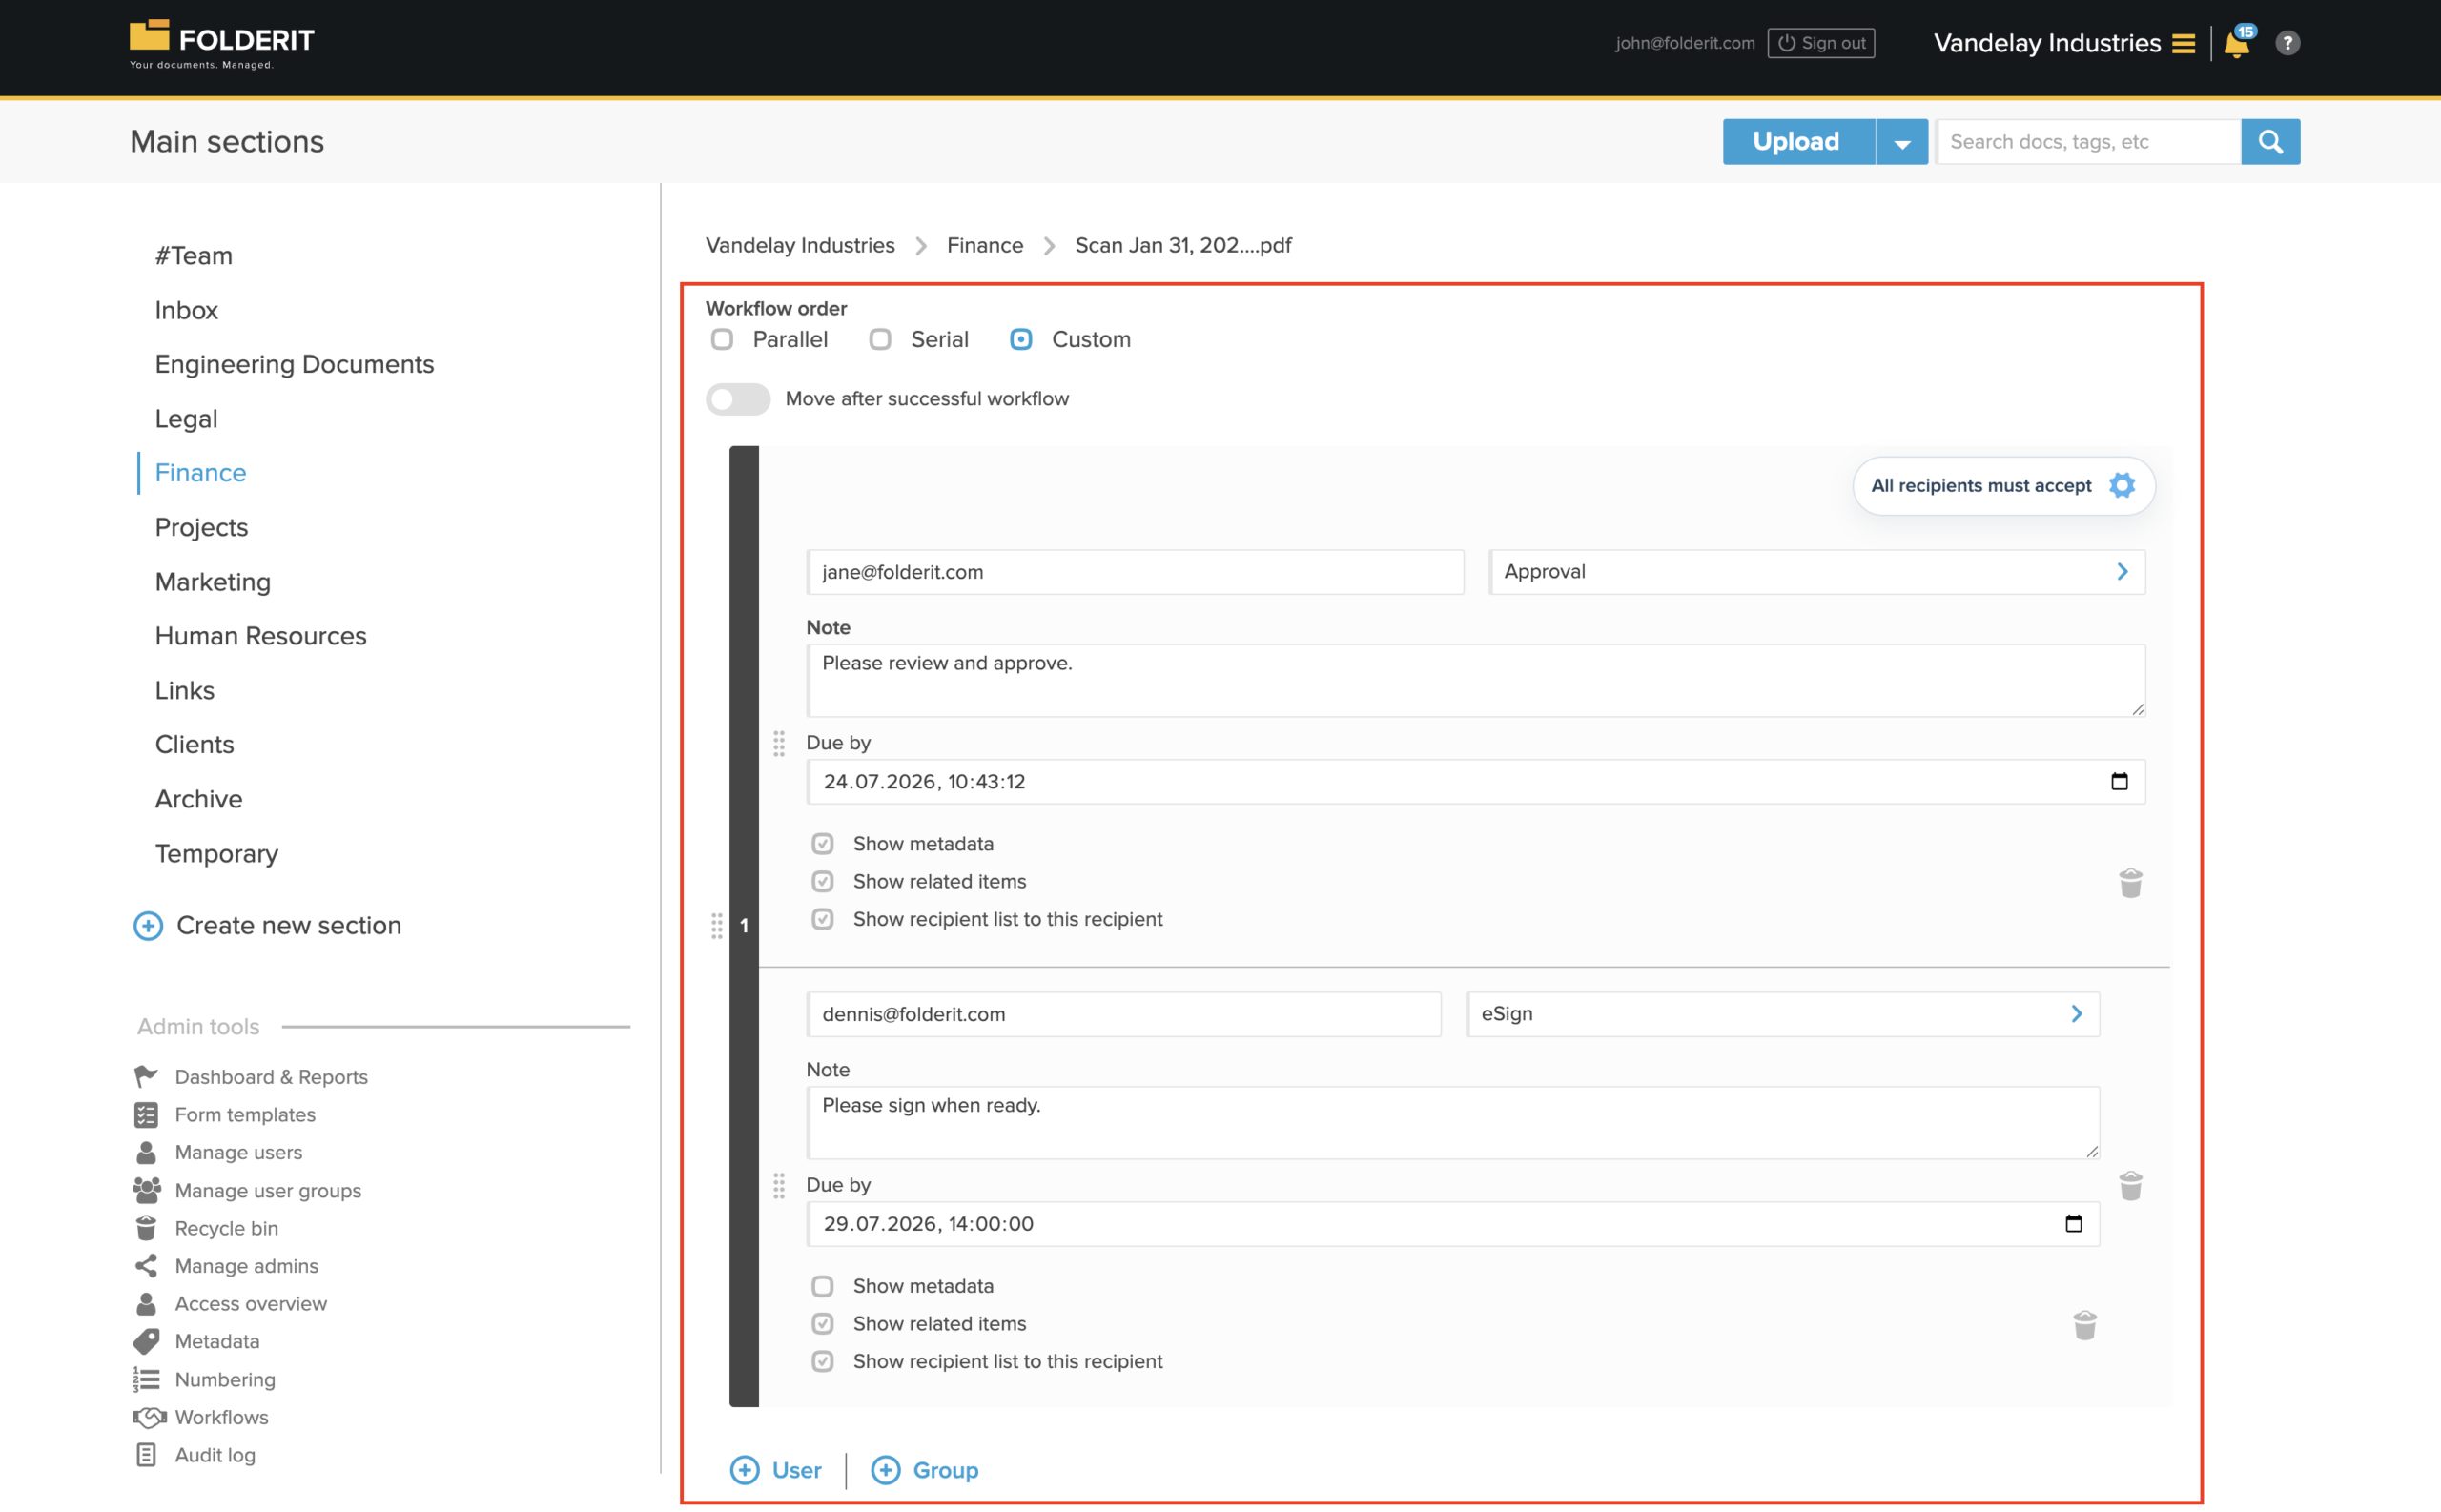
- Custom: approvers can be arranged into stages. Participants within the same stage are invited at the same time, and the workflow continues to the next stage after the current stage is completed.
- Enable Move after approval if the file should be moved automatically to another folder after successful completion, and then choose the destination folder. This is optional.
- Add individual users and/or user groups. After adding a group, you can use the list icon to view its members and reorder them where needed for a Serial workflow.
- Enable Metadata is visible in workflow if participants should be able to see the file’s metadata.
- Enable Related files are visible in workflow if participants should be able to access related items.
- Choose whether the same automation should also apply to subfolders.
- Click Create to save and activate the folder-level approval automation.
Starting a One-Time Approval Workflow
- Open the item’s detail view.
- Open the Workflow dropdown on the right.
- Choose Start approval workflow.
- Choose Parallel, Serial, or Custom order and add the required users and/or groups.
- Choose whether participants may see metadata and related items
- Enable Move after successful workflow if the item should be moved automatically after completion.
- Start the workflow.
If the process requires several different methods or stages, choose Build custom workflow from the same Workflow menu. For example, you can create approval stages followed by acknowledgement or electronic signing.
Using a Workflow Template
Workflow templates are useful for processes that are repeated regularly, such as contract approval, invoice review, policy approval, or document release.
Open the item’s Workflow dropdown and choose the required template. Only templates that are available for the current item type are shown.
A template may be configured for files, folders, links, or records created from a particular eForm. Administrators create and manage templates under Admin tools → Workflows → Templates.
Creating Other Workflow Automations
More advanced automations can be created with the visual workflow builder under Admin tools → Workflows → + Automation.
Unlike the folder-level automation described above, visual workflow automations can use their own configured triggers and conditions. They can also combine several workflow methods and stages in one automated process.
Saved automations may also be listed in an item’s Workflow dropdown, allowing an authorized user to start them manually for that item.
Acceptance and Rejection Rules
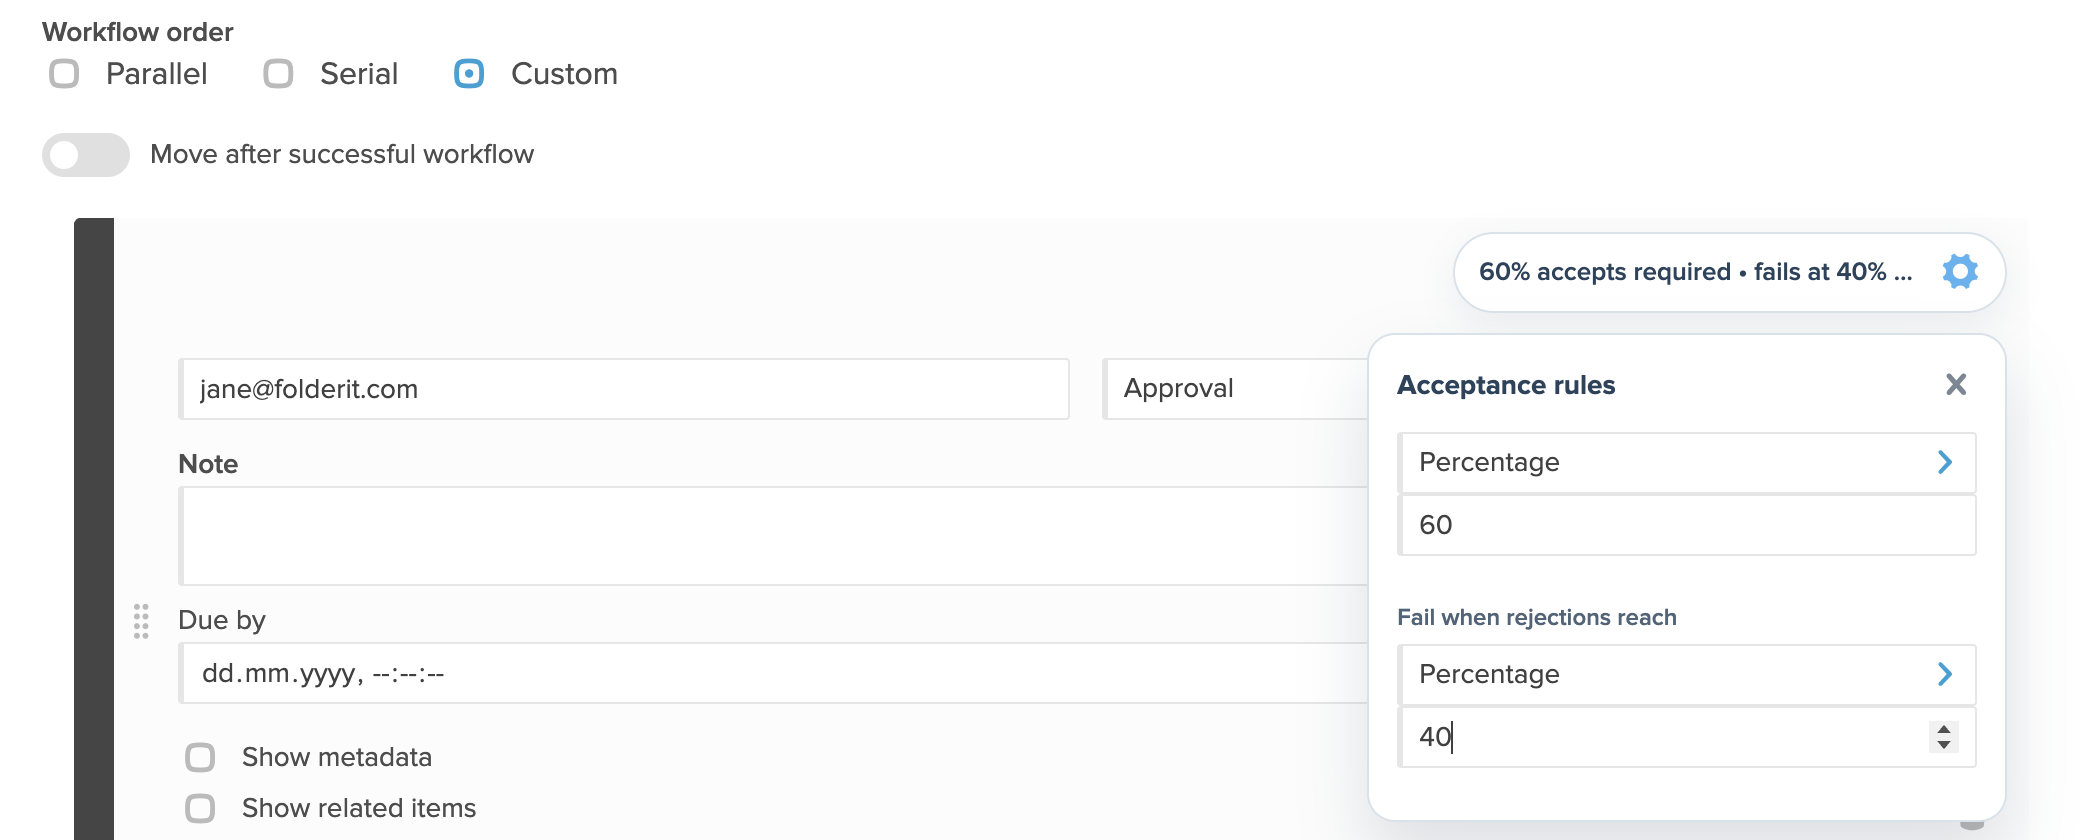
When a workflow stage contains several participants, it can use flexible acceptance rules. Depending on the process, the stage can require:
- acceptance from all recipients;
- a fixed number of acceptances;
- a percentage of acceptances.
You can also define when the stage should fail based on a fixed number or percentage of rejections. For example, a stage may continue after two of three people approve, or fail immediately after the first rejection.
Responding to an Approval Request
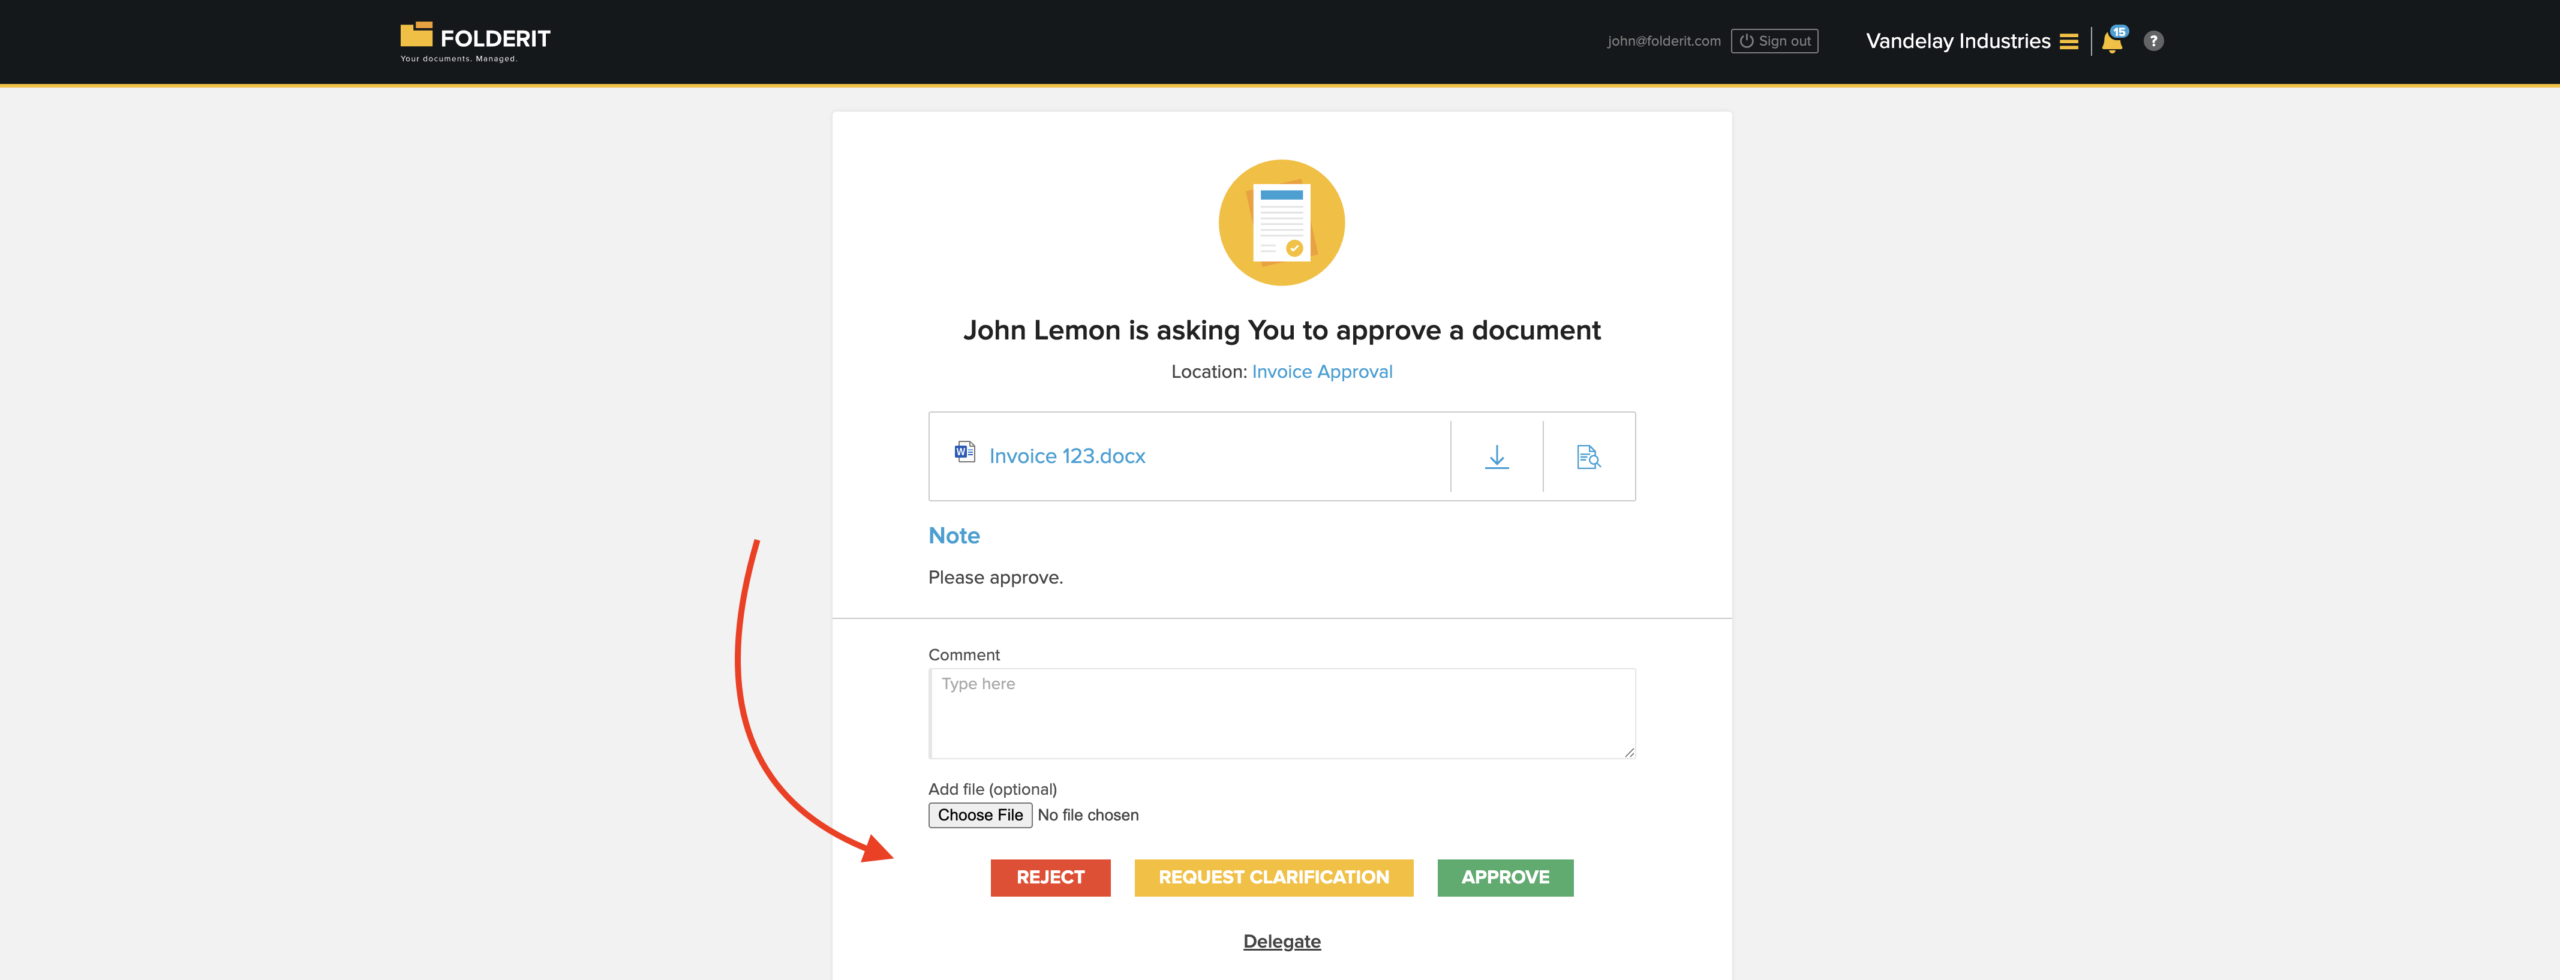
Workflow tasks are sent over email and appear in the recipient’s My tasks dashboard, which can be opened using the notification bell.
The recipient can review the item and any information made visible to them, add a comment or optional attachment, and then approve or reject the request.
If more information is needed, the recipient can choose Request clarification and send a question to another user or group without making a final decision. The original approval task remains open until the recipient is ready to respond.
Monitoring Workflow Status and Results
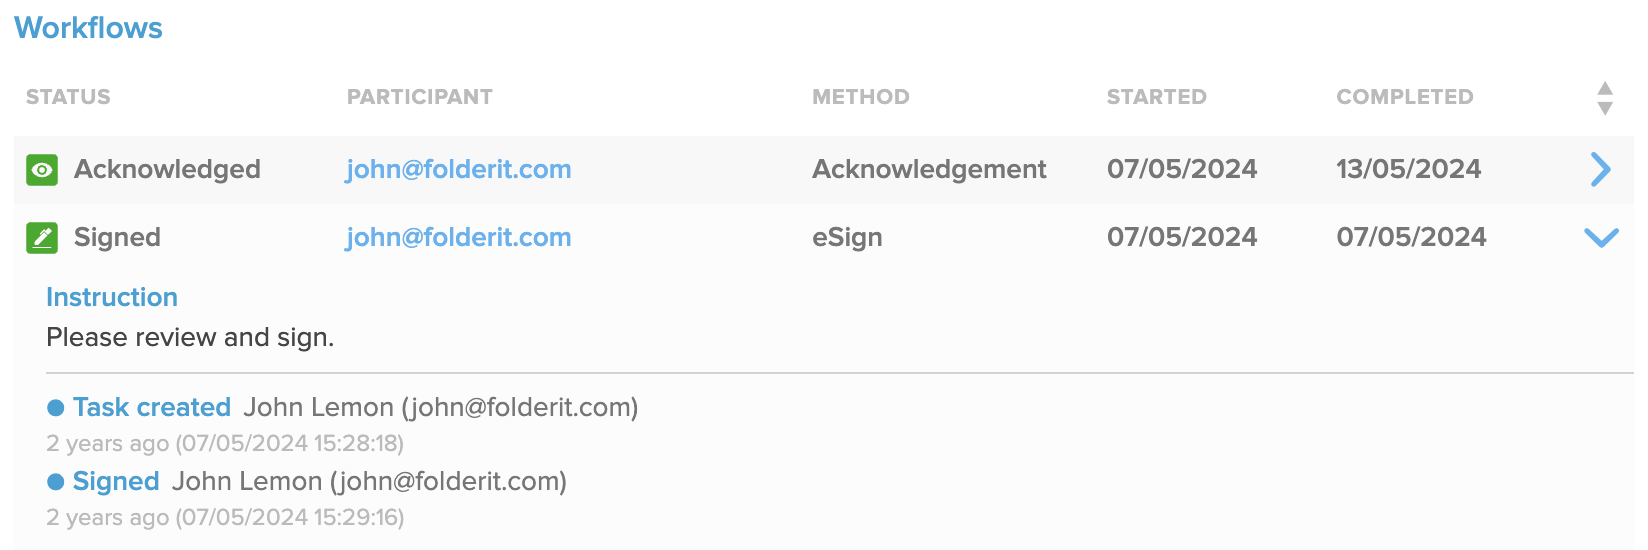
All workflows connected to an item are shown together in the Workflows section of its detail view. Each workflow entry shows its status, participant, method, start date, and completion date.
Expand a workflow entry to see its instructions, task creation, decisions, comments, participant names, and timestamps.
Downloading the Workflow Summary
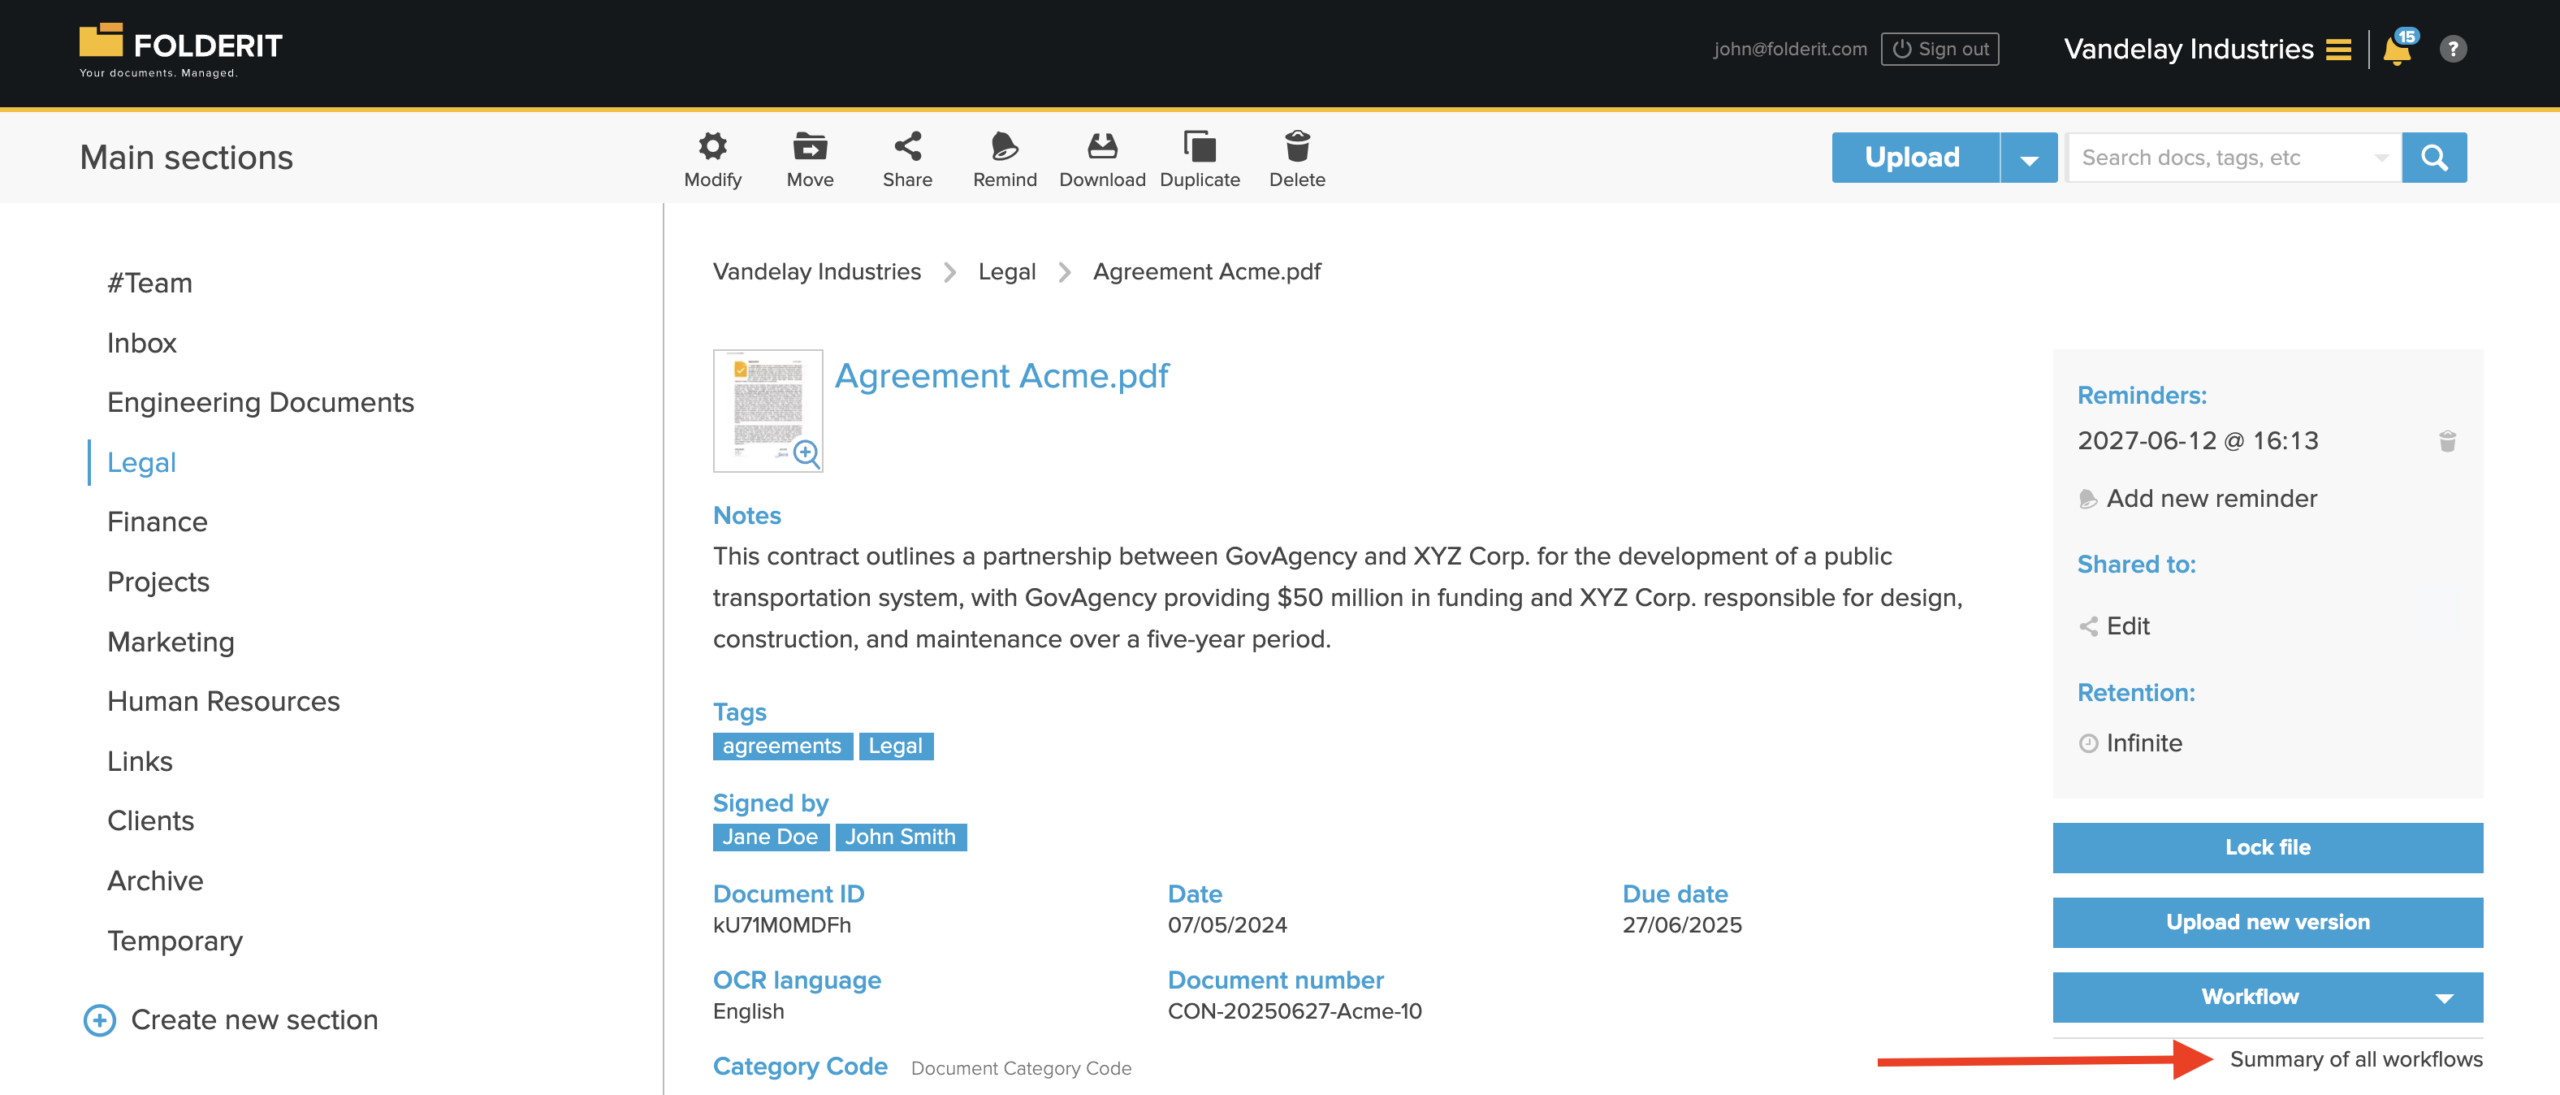
Use Summary of all workflows in the item detail view to download a consolidated record of the workflows completed for that item.
Depending on the item and file type, the available options can include:
- a PDF containing the file and workflow summary;
- a ZIP containing the file and summary;
- the workflow summary by itself.
When the latest version of a file has been electronically signed, downloading the latest version gives you the signed file directly. Signed files can also be selected and downloaded in bulk from the folder list.
Status Indicators
A folder with active folder-level workflow automation is displayed in blue with a stamp icon:

Approval status is also visible in the folder list:
- Yellow square with checkmark: the approval process is still active.
- Red square with checkmark: the item was rejected.
- Green square with checkmark: the item was approved.
