Sharing Files and Folders
It’s easy to share access to any resource in Folderit DMS — from a single file to your whole account. When sharing a resource, you can also choose the permissions users have for it. You can grant access by sharing either the resource itself or a tag associated with it!
Folderit features 5 permission levels:
- Previewer — Preview-only permission that allows the user to see the documents shared to them only as an in-system preview. They cannot download or print the resource, or do anything else with the documents or the system.
- Viewer — The user can preview the files shared to them in-system, print and download the files. They cannot change any metadata or versions, they also cannot delete files.
- Editor — Editors can preview and download files, change metadata, add versions and delete the documents shared to them with ‘Editor’ permission. Sharing a folder or section with ‘Editor’ permission allows the person to add files and folders into that structure.
Granting ‘Editor’ permissions on an account level will make the person an administrator of that account. - Upload-only — The user can only upload files to the folder and see only the files/folders the user has added themselves, not see any of the files or folders added by others in the folder.
- Custom — granular permission editor (available in Tailor plan only)
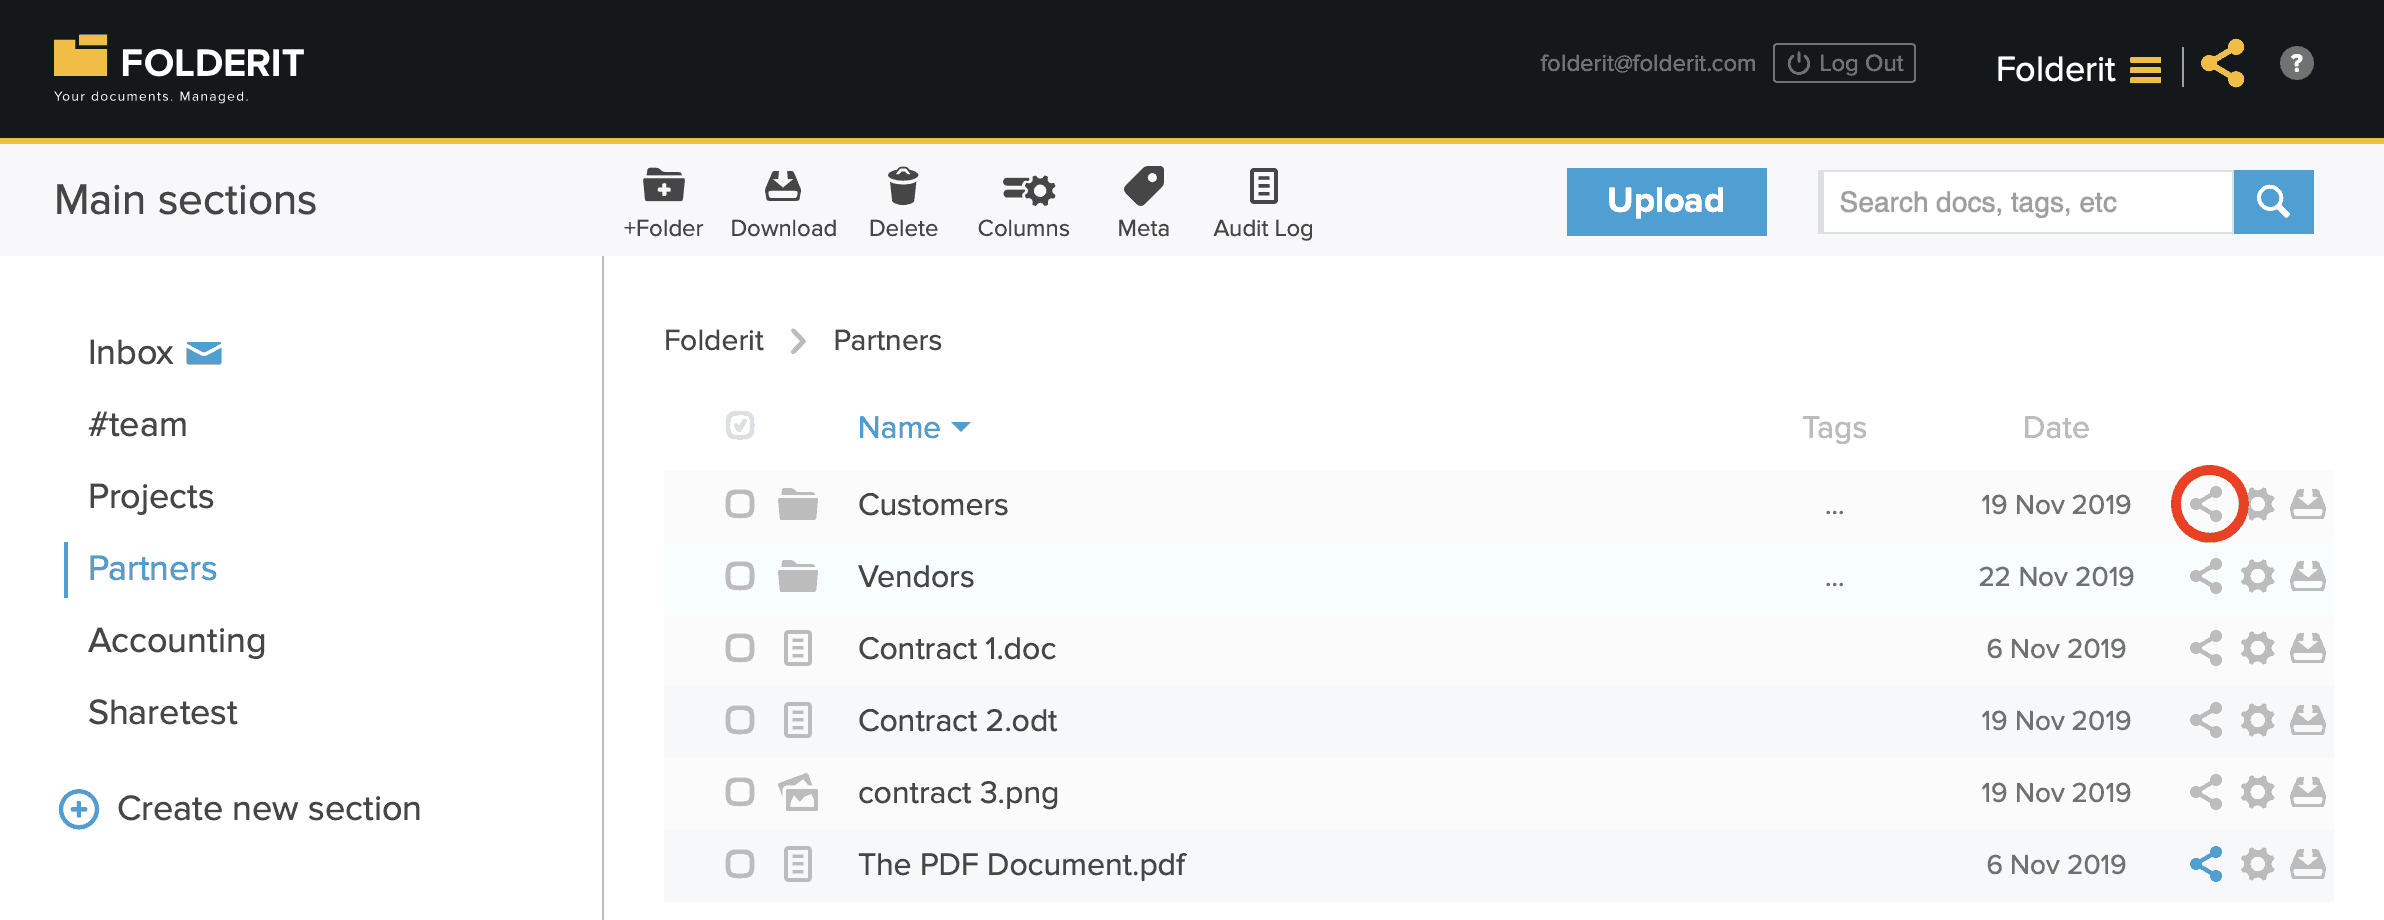
Tip: To begin sharing a resource, click on the sharing icon. Once shared, the icon will turn blue in the list view for easy identification. Clicking the icon again lets you modify existing sharing permissions or extend sharing to additional users.
Sharing an Individual File
Click on the Sharing button on the right side in the list view:

Or, when you click on the file and get to the details view, choose ‘Share’ from the toolbar:

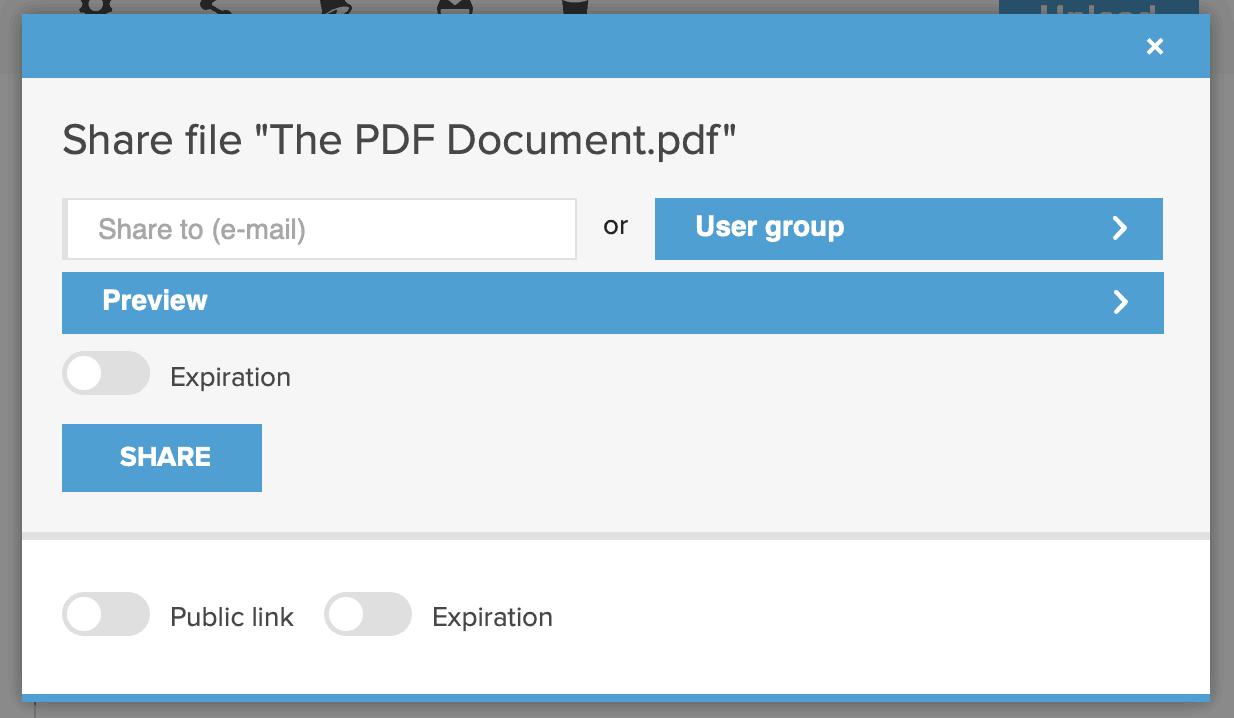
When you click on the sharing icon or button, a window appears:

Now think if you want to share the document to an individual user, a group of users or make it accessible via a public link so that everyone who knows the address, can access the resource.
- Sharing to a registered user — Type in the email address of your registered collaborator on the ‘Share to (e-mail)’ field. Then choose the permission level (Preview, Viewer, Editor, Custom) and if you want the access to this file to expire in time. If so, turn on ‘Expiration‘ toggle and choose date and time when access to the resource will be cut off for this user.
Click ‘Share’ to activate the resource sharing. Then you can start sharing to another person or group or exit the window. - Sharing to a user group — If you have created a user group, you can share the resource to all of the users in a group at once. For that, click on ‘User groups’ and choose the group you have created from the drop-down list. Then choose the permission level (Preview, Viewer, Editor and if you want the access to this file expire in time. If so, turn on ‘Expiration’ toggle and choose date and time when access to the resource will be restricted for this user group.
- Sharing with a public link — Click on the ‘Public link’ toggle to activate a public link. You can copy the link from the text field or click on ‘Copy’. Who ever knows the link can access the file now but only to download or preview it. They cannot make changes or delete the file when accessing it anonymously. If you want the link to automatically stop working at any point of time, toggle on ‘Expiration’ and choose date and time, or manually toggle ‘Public link’ off when you no longer want it active.
Note that the link is automatically generated each time you toggle it on, so if you have an active link and you toggle ‘Public link’ off and on again, the links will not be the same.
Sharing a Folder or a Main Section
In file list view, click on the sharing button at the end of the row of a folder name:

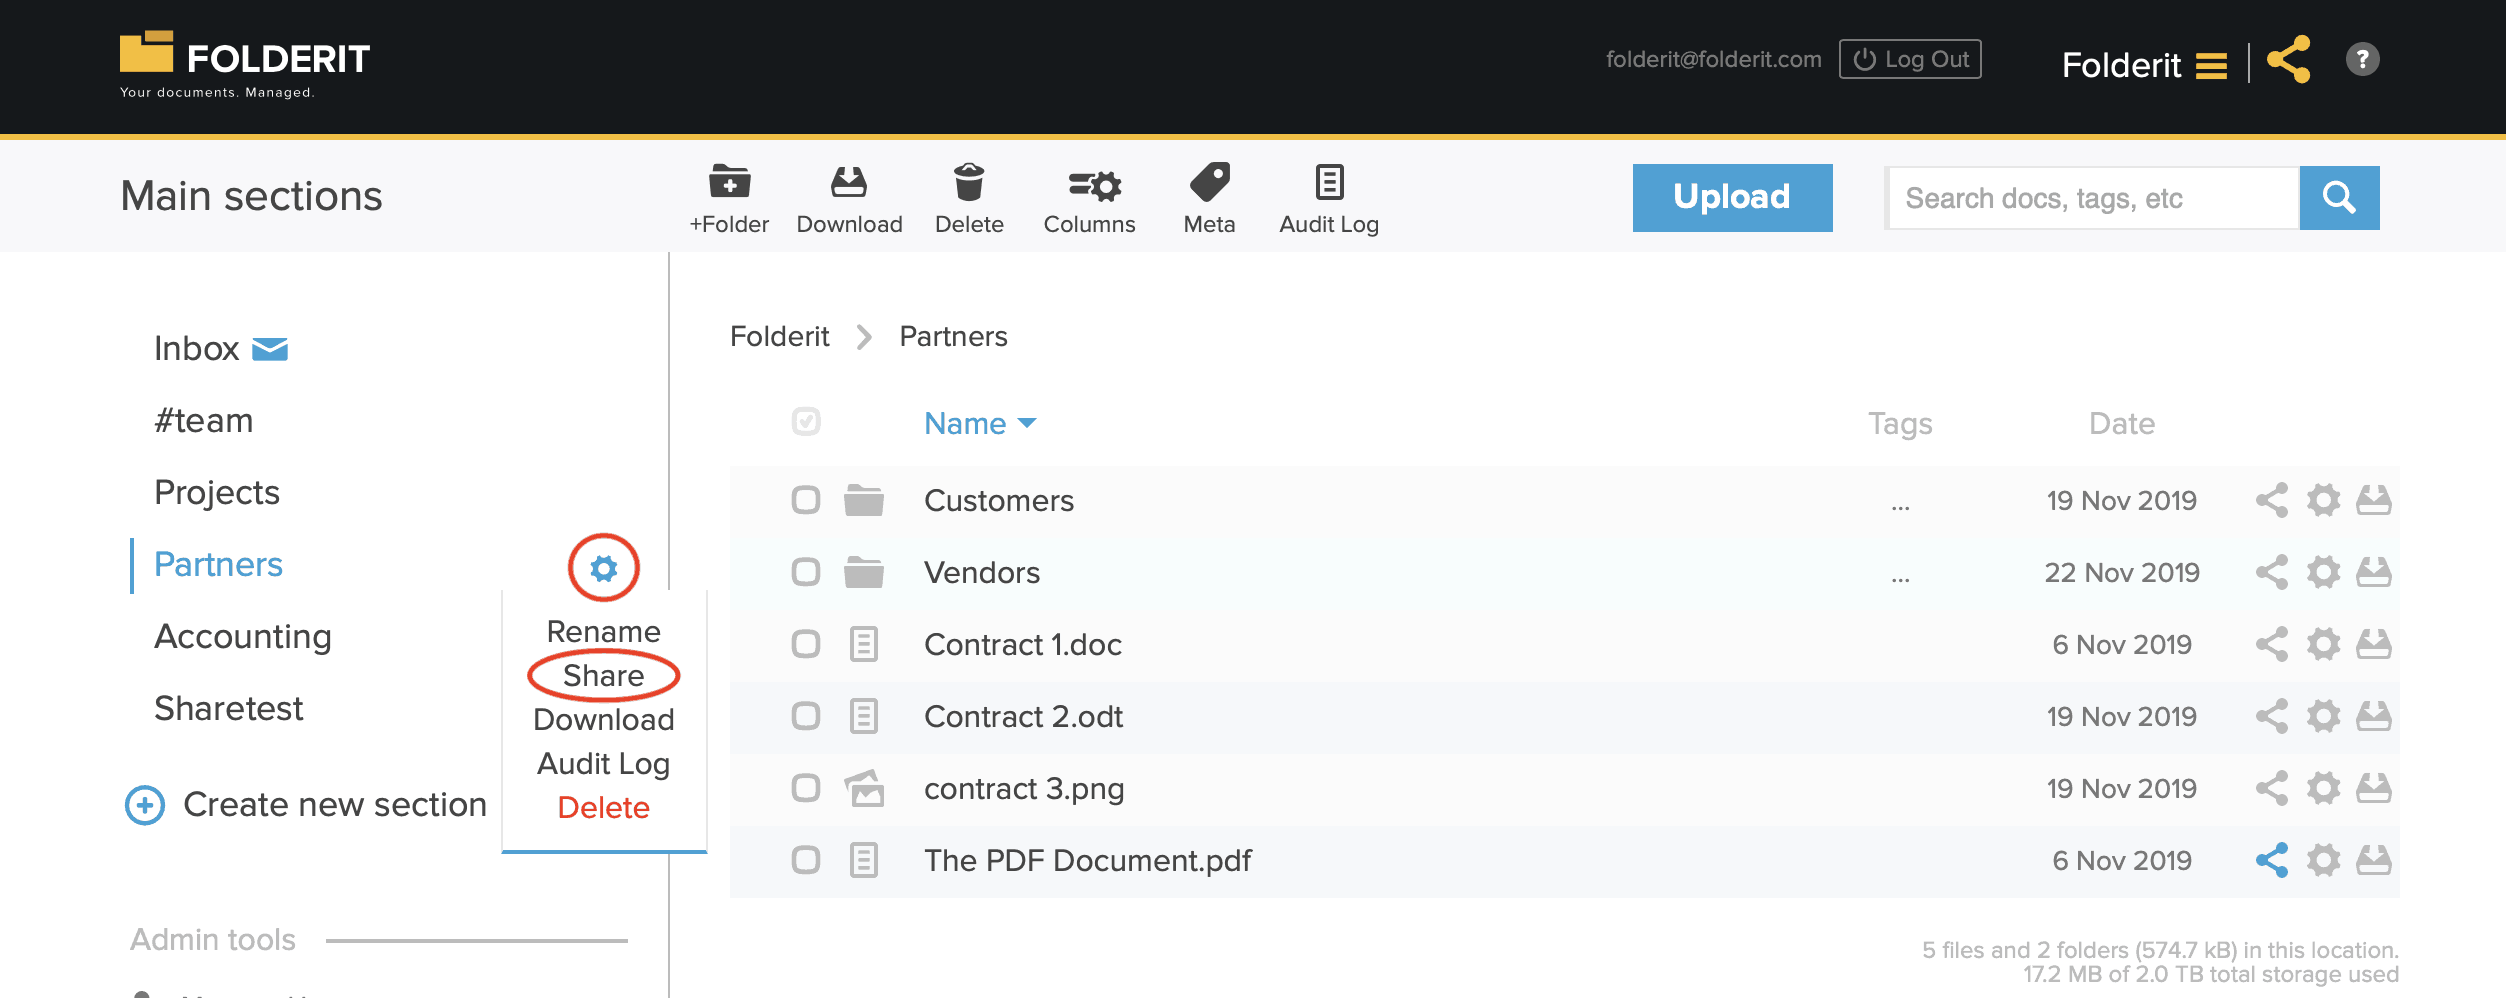
To grant access to a Section, hover your mouse over its name and click on the settings (gear) icon that appears. Choose ‘Share’ from there:

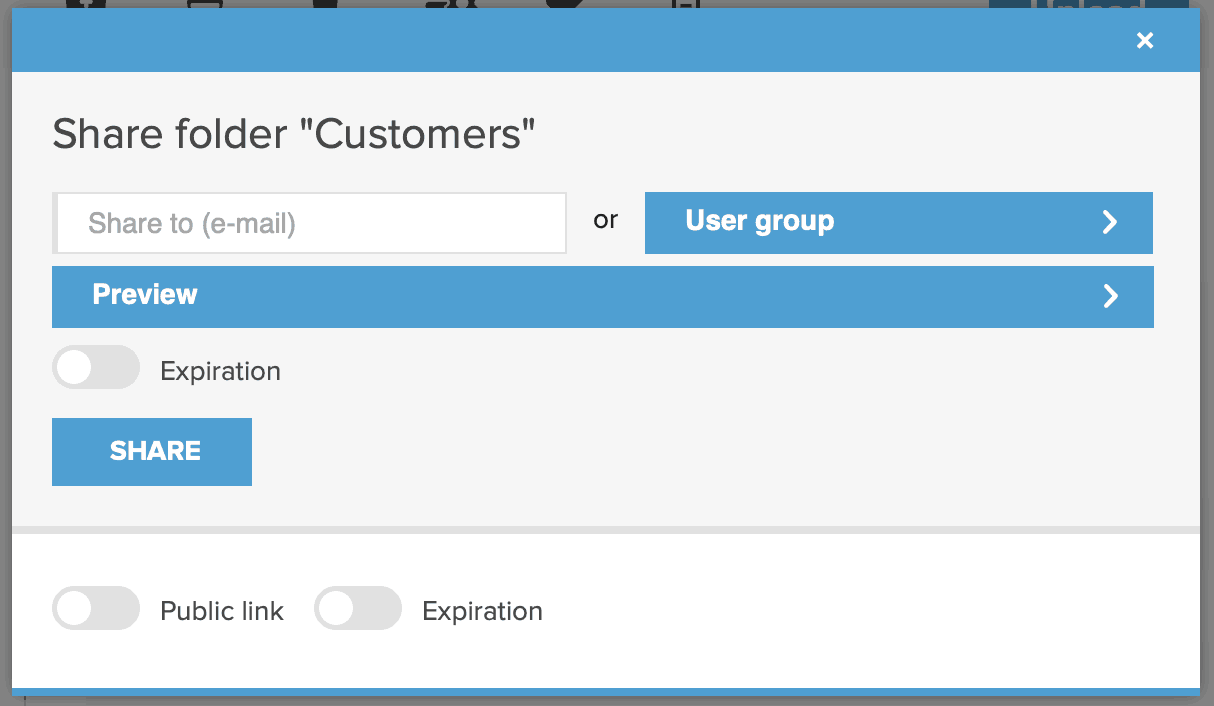
On both cases similar sharing window appears:

Decide if you want to share the folder/section to an individual user, a group of users or make it accessible via a public link so that everyone who knows it, can access its content.
- Sharing to a registered user — Type in the email address of your registered collaborator on the ‘Share to (e-mail)’ field. Then choose the permission level (Upload-only, Preview-only, Viewer, Editor — only Editors can both add and delete files from the folder) and if you want their access to this folder expire in time. If so, turn on the ‘Expiration’ toggle and choose date and time when access to the resource will be restricted for this user.
Click ‘Share’ to activate the sharing. Then you can start sharing to another person or group or exit the window. - Sharing to a user group — If you have created a user group, you can share the resource to all of them at once. For that, click on ‘User groups’ and choose the group you have created from the drop-down list. Then choose the permission level (Upload-only, Preview, Viewer, Editor) and if you want the access to this file expire in time. If so, turn on ‘Expiration’ toggle and choose date and time when access to the resource will be restricted for this user group.
- Sharing with a public link — Click on the ‘Public link’ toggle to activate a public link. You can copy the link from the text field or click on ‘Copy’. Who ever knows the link can access the folder’s content but only to download the files. They cannot preview, modify or delete anything. If you want the link to automatically stop working at any point of time, toggle on ‘Expiration’ and choose date and time, or manually toggle ‘Public link’ off when you no longer want it active.
Note that the link is automatically generated each time you toggle it on, so if you have an active link and you toggle ‘Public link’ off and on again, the links will not be the same.
To share access to your whole account with another user, read this article: Granting an account-level access.
Sharing Resources Using Tags
Administrators can start by going to ADMIN TOOLS > MORE TOOLS > METADATA. Now click on the TAGS button in the toolbar. Here, you will see a list of all created tags. Next to each tag, you will see a sharing icon. Click on the sharing icon next to the tag you want to share.
A sharing modal will appear. Here, you can select the users or groups you want to share the tag with, and assign the appropriate permission level (e.g., preview only, edit, etc.).
Administrators can easily share resources associated with a specific tag or its sub-tags with designated users or groups and assign appropriate permission levels.