Adding Users
Users that you add are your team members that can have access to your central storage in the capacity you choose. By default, all your team members will have access to just one folder — the #Team section (if enabled, see below how to disable). All other data is hidden until you make them available for the users. The users you have added to your system can be assigned to user groups, so you can manage their access in bulk.
You can choose which users can access which resources and with what kind of permissions: Upload-only, Preview-only, Preview & Download, Editor or Custom (in Tailor plan only).
To add a new user to your Folderit account, you can do as explained below, or use our Microsoft Entra ID (formerly Azure Active Directory), Okta SAML, Okta SCIM or Google SAML integration for centralized user management and SSO.
Adding user manually:
- Log in as an account administrator
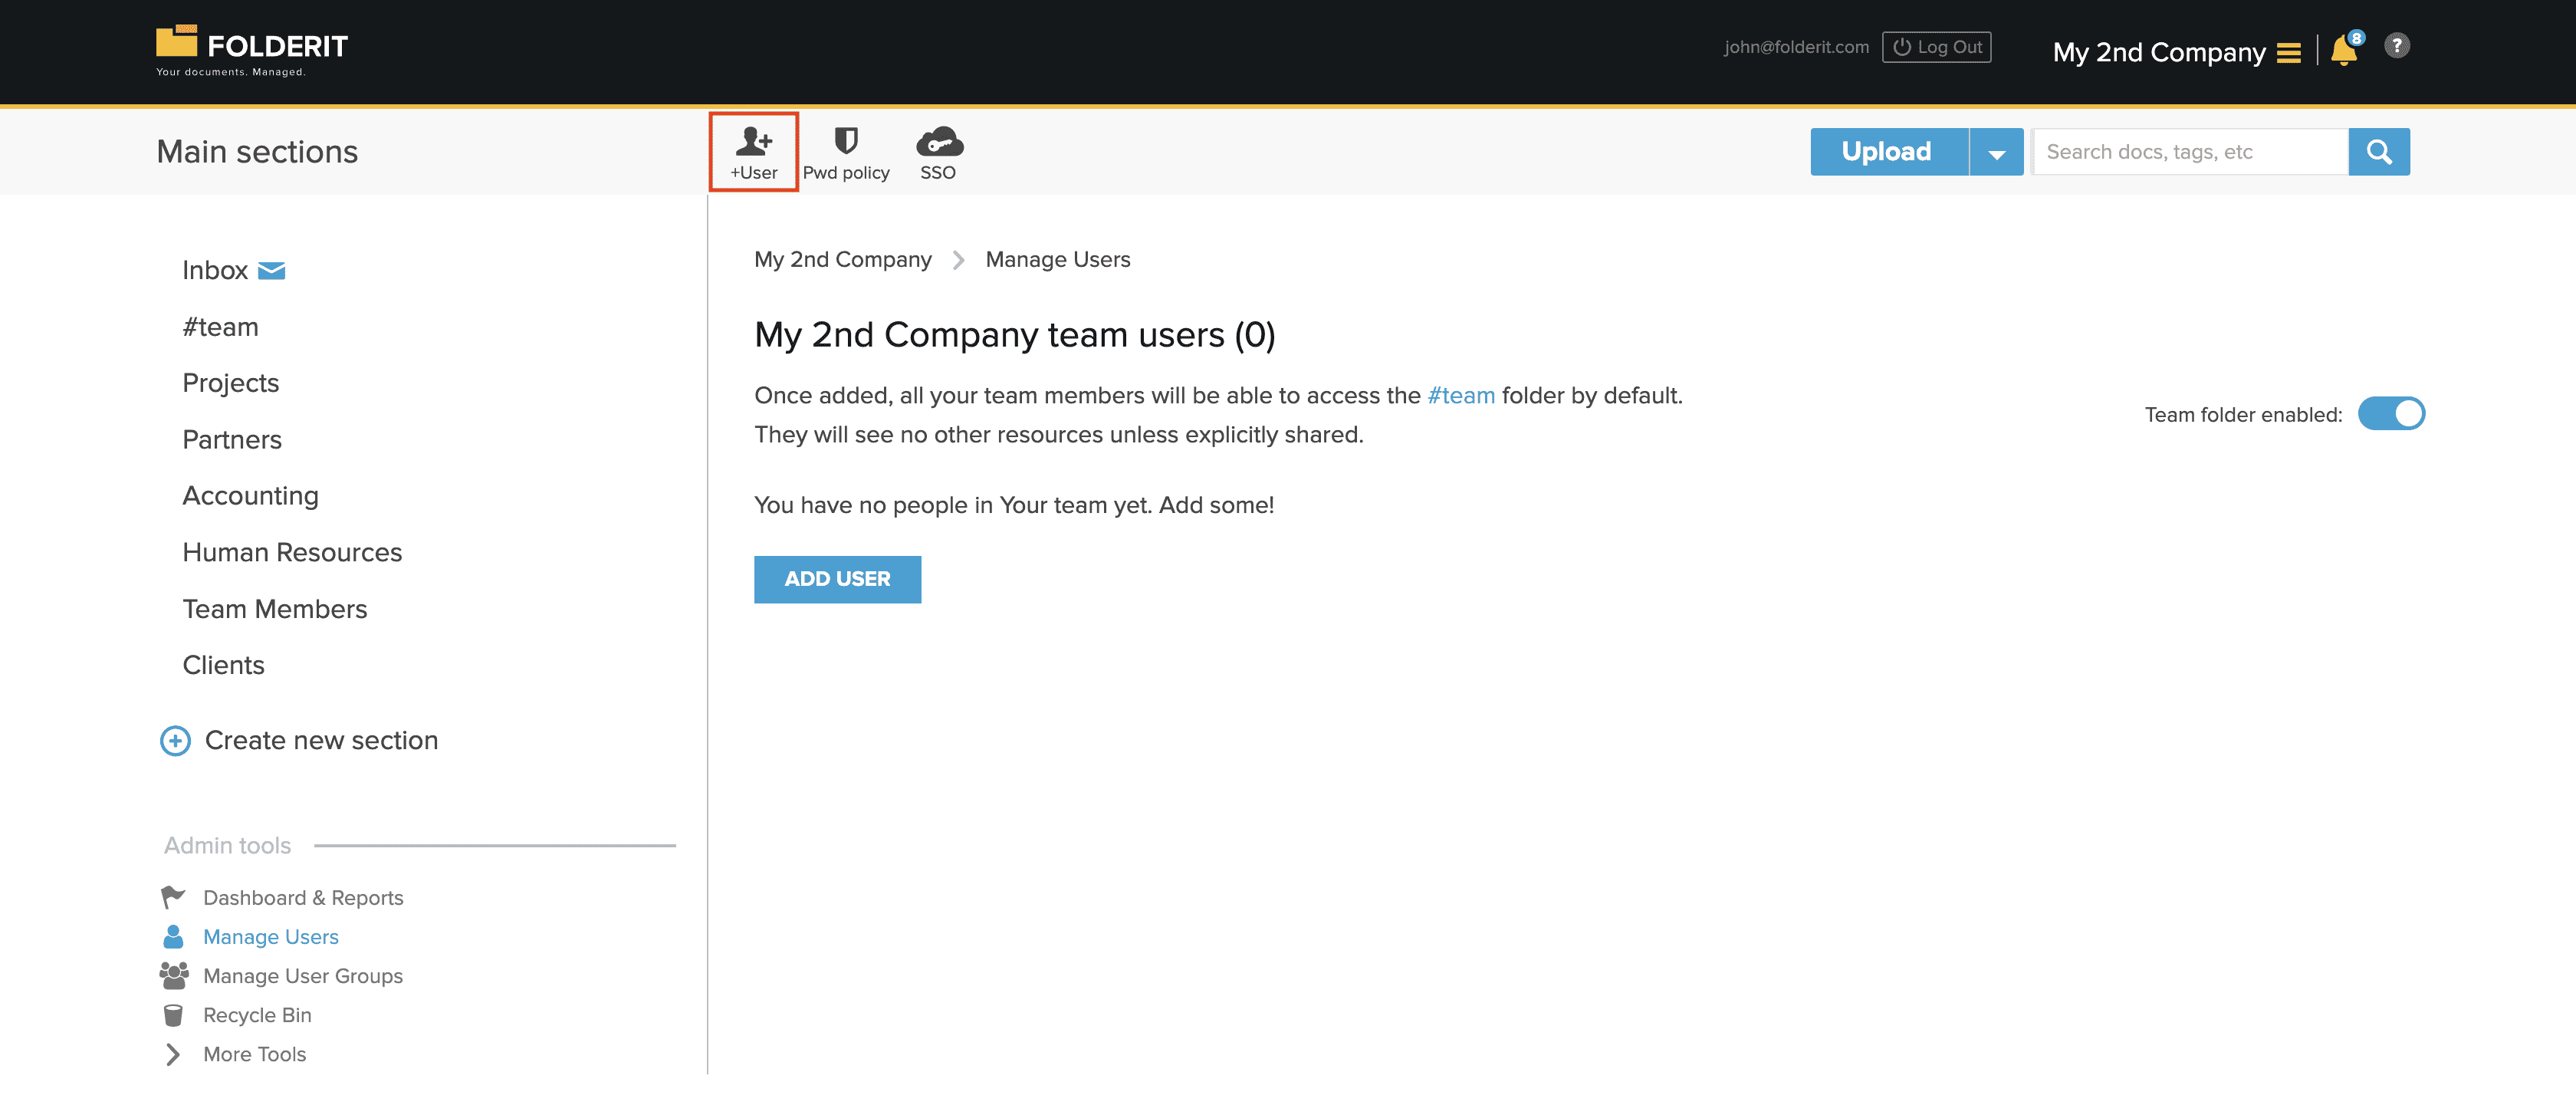
- Locate Admin Tools on the left side of the system and click ‘Manage Users’
- Click the ‘Add User’ button or ‘+User’ in the toolbar
A modal appears where you can input the user’s information. The most important of them is the e-mail. This will be the person’s user name in Folderit and this is where they will receive the invitation to join your team.
This is how the invitation looks like:

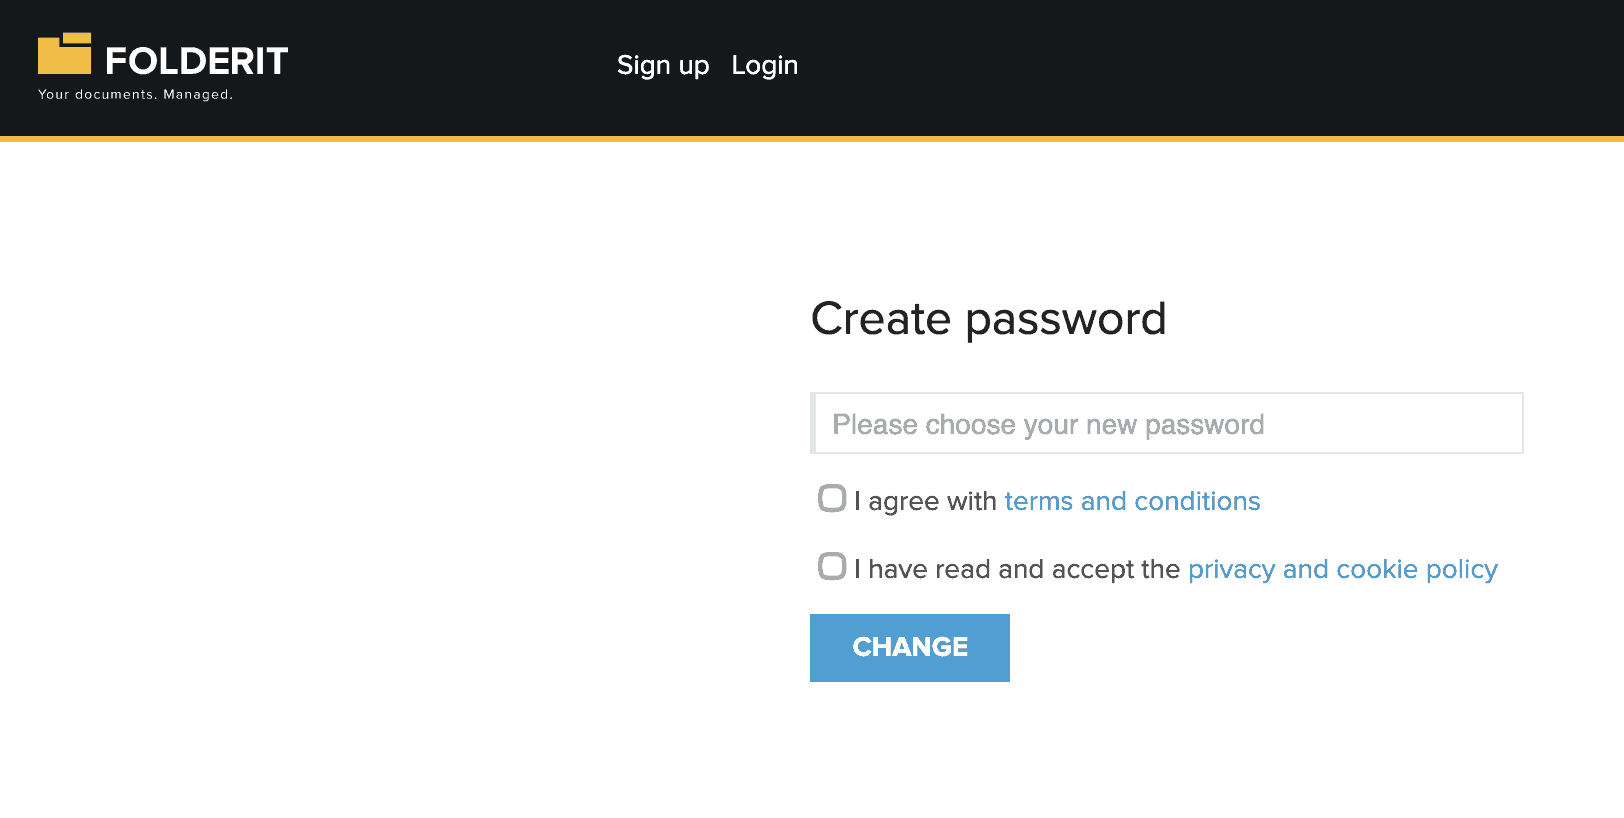
The invited person should click on the “Choose your password” button. At the destination website they will be able to choose their user account’s password:
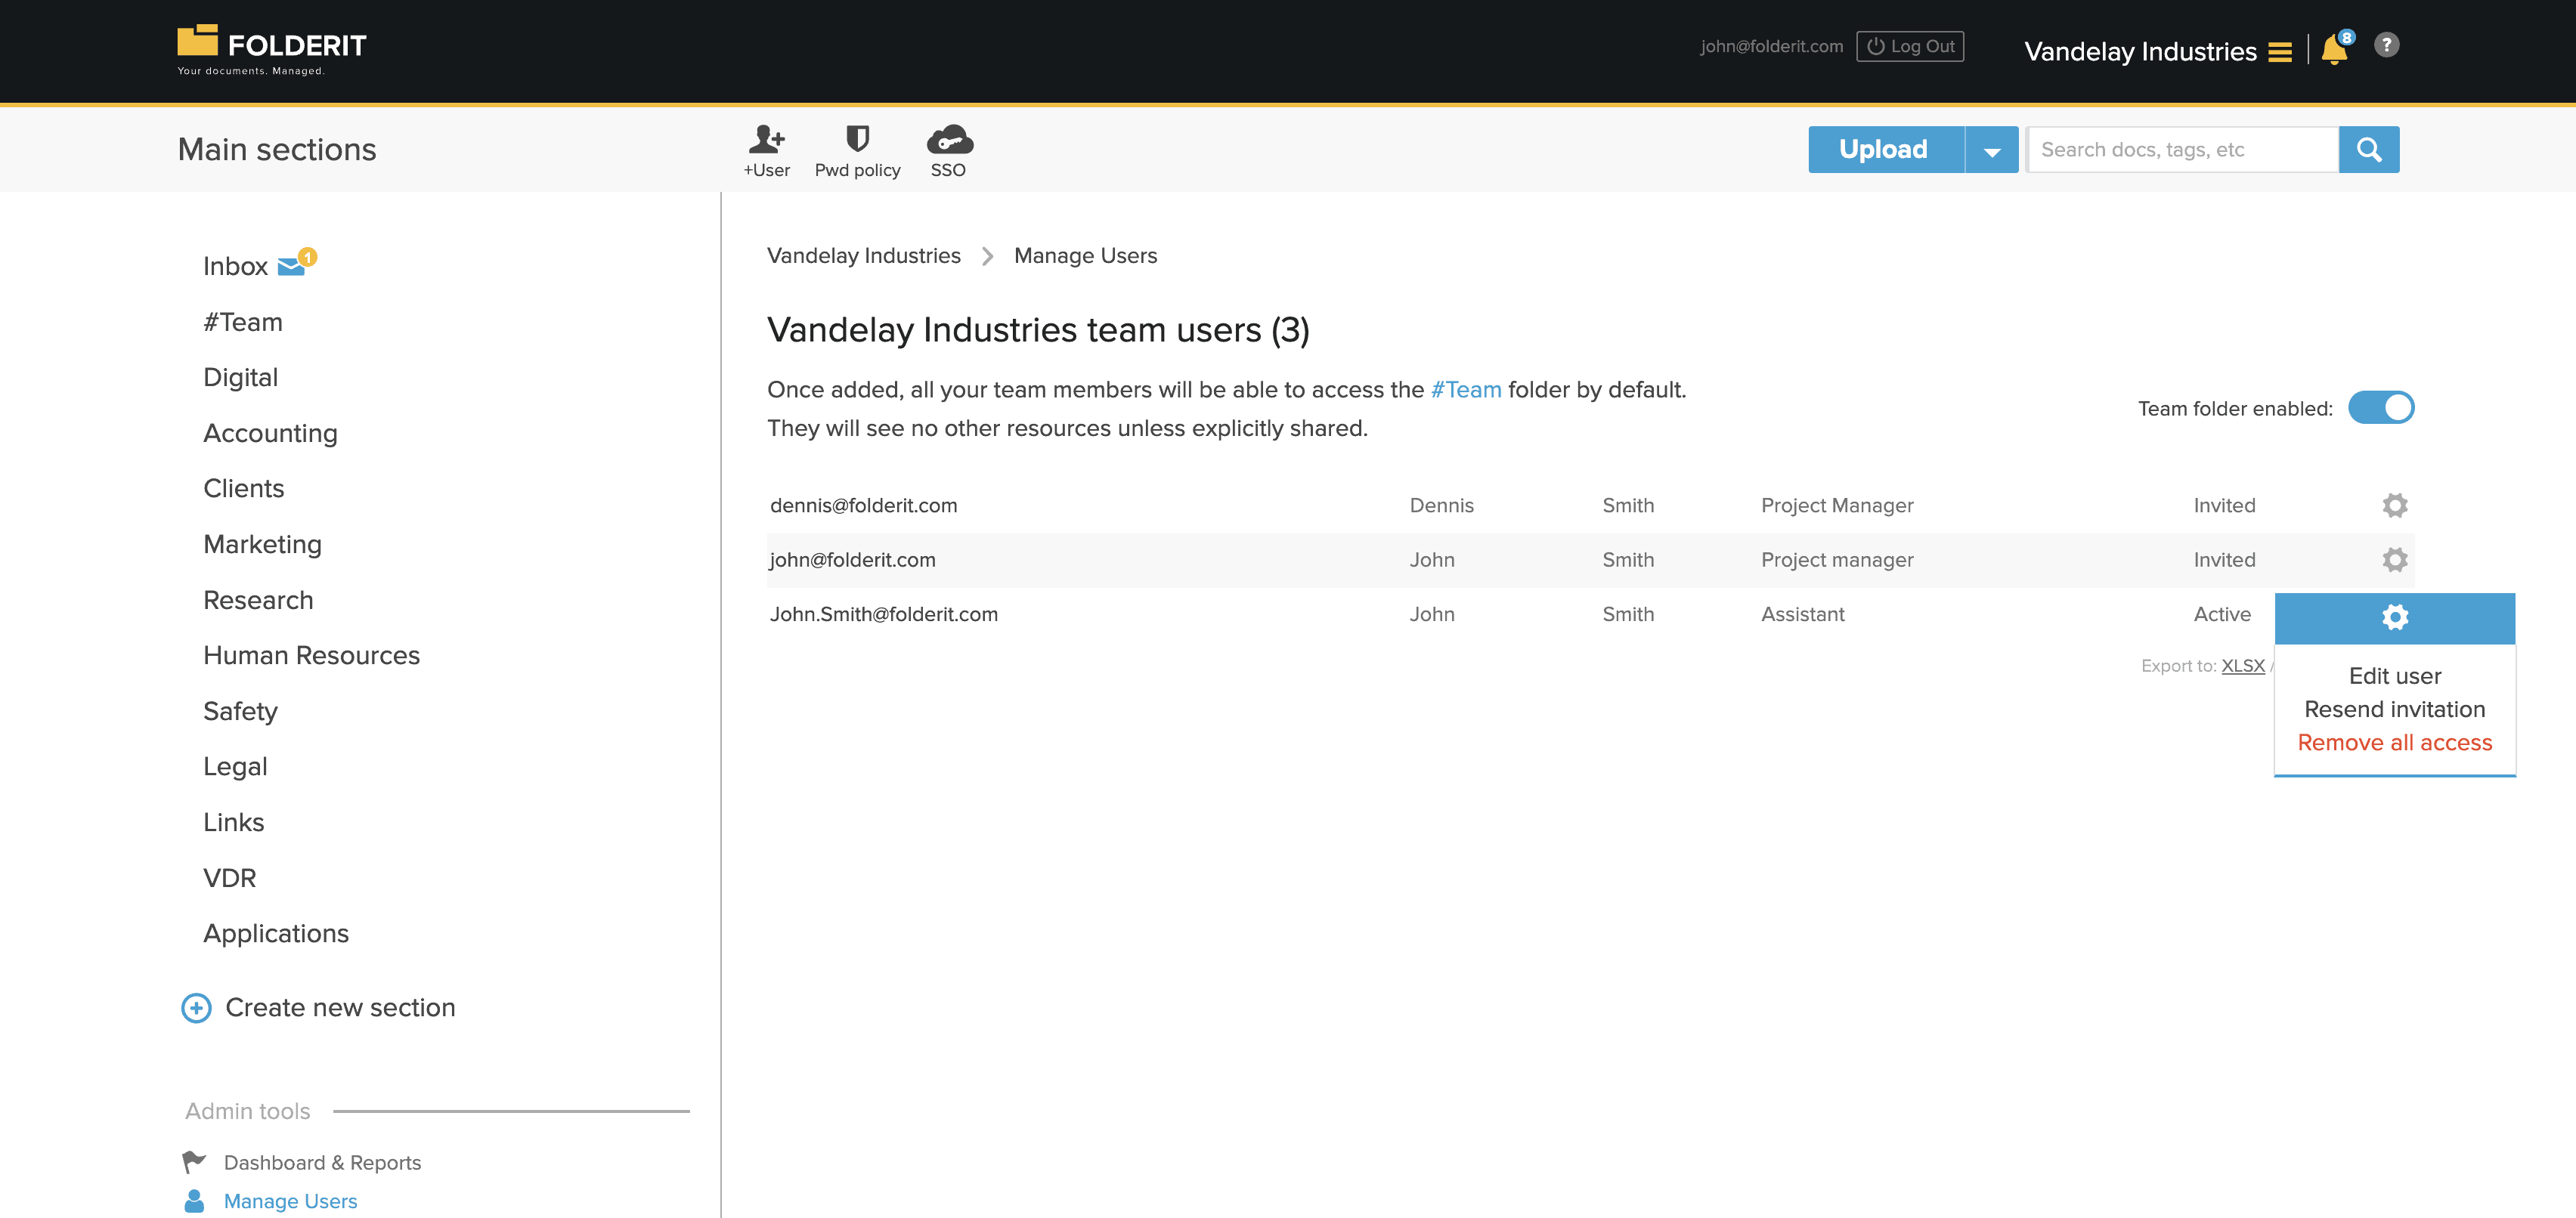
After you have added a user, it appears in the users’ list. Even before the person has finished their registration by clicking the link and choosing their account password. The list provides an overview of all your users, their emails, names and position in company (if this information is provided by you) and if they have completed registration.
The gear icon next to the user opens up a menu that enables you to:
- Edit team user — You can edit the name and position of the person
- Resend invitation — If the user has not received their invitation to join your team, you can resend it. Also, make sure the invited person checks their Junk email folder!
- Remove all access — Removes the user from your team and cuts off all access to your resources. If for any reason (for example if the employee leaves your organization) you want to remove the person’s access to any and all of your resources for good.
How to disable #team folder?
Log in as an administrator. Go to Admin tools > Manage Users and toggle off the “Team folder enabled” button. The folder is then not visible by default any more and can even be deleted. Re-enabling recreates the empty folder again.