Custom Metadata Fields and Folder Templates
Use this guide to create custom metadata fields, configure List value colours, and apply fields through folder templates. For example, you can create a Criticality field with Low, Medium, and High options, then add it to a folder’s template.
To enter or change values on a document, see Add and Edit Metadata.
Creating and managing custom fields requires the account-level Manage Metadata permission. See granting account-level permissions.
- Apply fields to a folder with a template
- Create a field and choose its type
- Use Keys to match List options with external codes
- Set text and background colours for List values
- Edit or delete an existing field
- See which forms use a field
Create a folder-level metadata template
A folder-level metadata template automatically adds predefined fields to new resources placed in a folder. This helps ensure that files, folders, and links are described consistently.
- Open the folder where you want to configure the metadata template.
- Click Meta in the toolbar.
- Click the + button below the field-name column.
- Select an existing custom metadata field from the list, or click the additional + option to create a new field.
- Choose the field’s Required, Recursive, and Include settings.
- Add any additional fields required for the template.
- Save the folder metadata configuration.

Required, Recursive, and Include settings
Required
Enable Required when users must complete the field while modifying the resource’s metadata.
For the user steps, see completing missing required values.
Recursive
Enable Recursive to apply the custom field to the selected folder and its subfolders.
Recursive templates are useful when an entire branch of the folder structure should use the same metadata requirements.
Include
Use the Include settings to choose which resource types receive the field:
- files;
- folders;
- external links;
- any combination of these resource types.
Each metadata field in a folder template can have its own Required, Recursive, and Include configuration.
Create a custom metadata field
While setting up a folder template, use the additional + option in the field selector to create a new field. Enter its name, an optional description, and the appropriate data type.
Available field types include:
- String — a short text value;
- Long text — a longer description or note;
- Checkbox — a yes-or-no value;
- Date — a calendar date;
- Datetime — a date and time;
- Time — a time value;
- Integer — a whole number;
- Decimal — a number containing decimal places;
- List — a predefined set of selectable options;
- Email — an email address;
- URL — a web address;
- User — a Folderit user;
- Entity — a structured entity value.
When using the List field type, remember to define the available list options before saving the field.
Key for List options
The Key field beside each List option lets you enter your own code for that value. Use it when you need to match a Folderit list value with the corresponding code in another business system, such as Microsoft Dynamics 365 Business Central.
For example, a Contract Type list can use readable option names in Folderit and the following codes from your other system:
| List option | Example Key |
|---|---|
| NDA | CT001 |
| Service Agreement | CT002 |
| License | CT003 |
These codes are examples. Enter the actual codes agreed for your integration. The option name identifies the choice to users, while the Key provides a code that an integration can use to match that choice between systems.
To enter a Key for an existing List field, go to Admin Tools → Metadata, open the field’s gear icon → Edit, enter the code in the Key box beside the relevant option, and click Save.
Entering a Key does not establish a connection to another system. The integration must be configured to use these codes for matching values.
Set text and background colours for List values
For metadata fields of the List type (a predefined set of selectable options), you can choose a separate text colour and background colour for each value. For example, a Criticality field can use green for Low, yellow for Medium, and red for High.
Set colours when creating a new field
- Create a custom metadata field and select List as the field type.
- Add the selectable values.
- Use the two colour controls beside each value to choose its text colour and background colour.
- Click Save.
Change colours for an existing field
- Go to Admin Tools → Metadata.
- Find the List field you want to change.
- Click its gear icon in the Actions column and select Edit.
- Set the text colour and background colour for each value, then click Save.
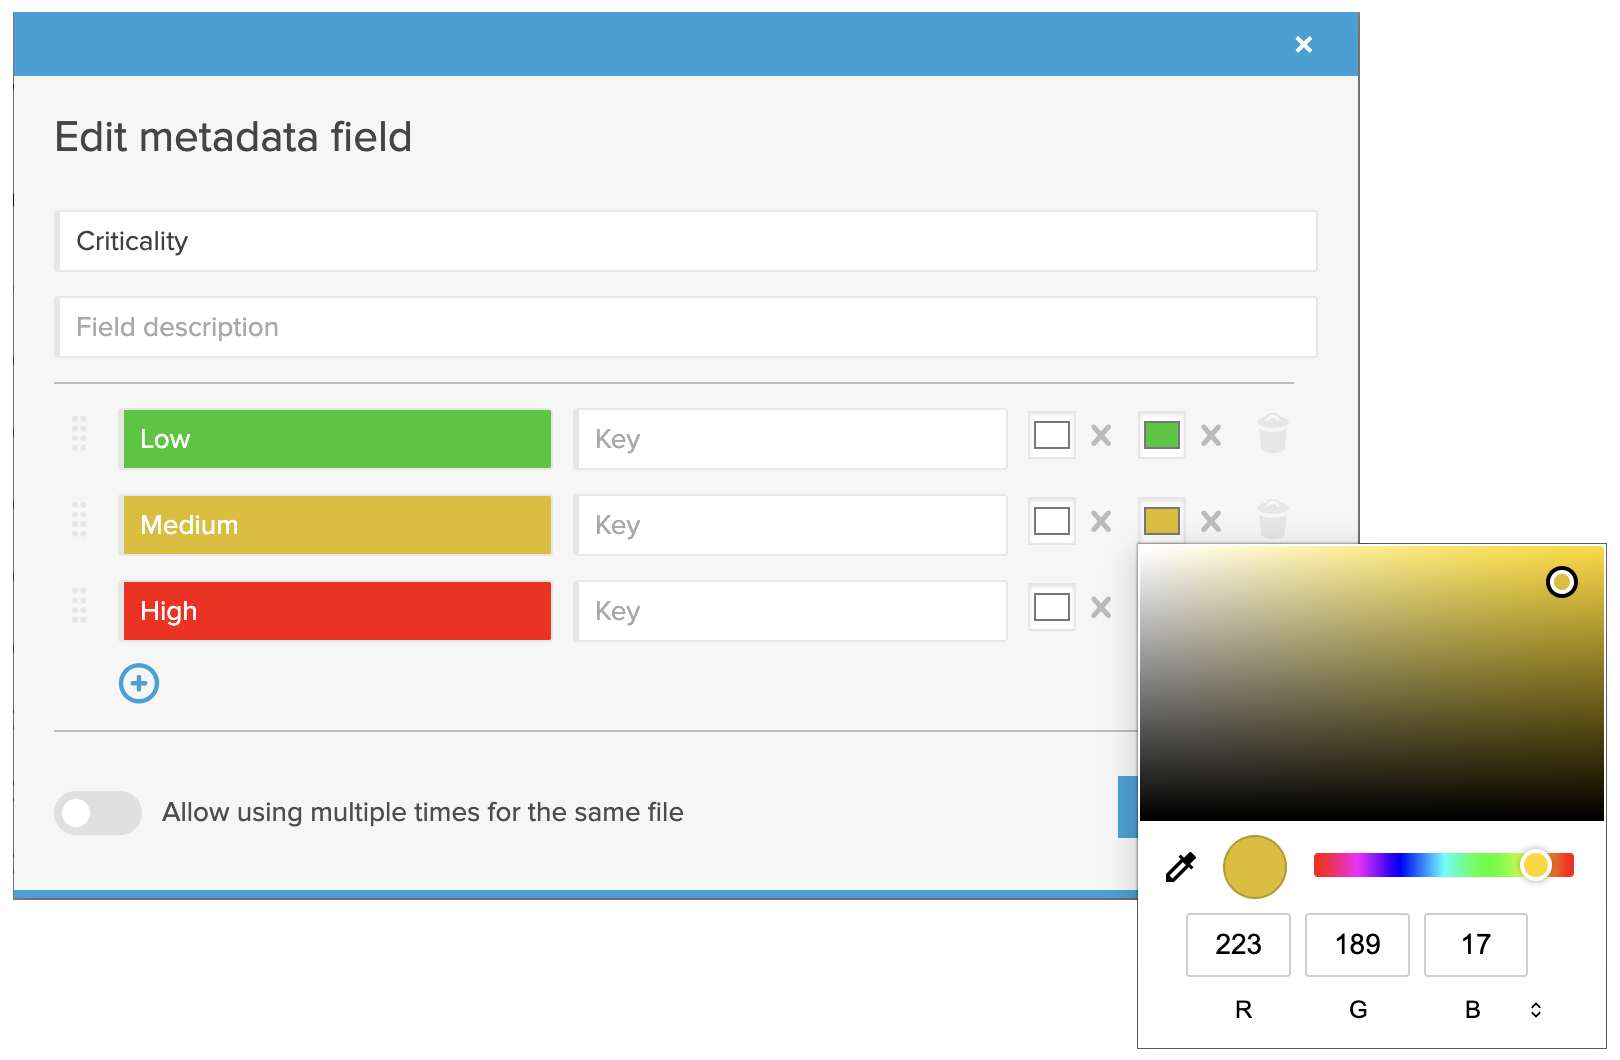
When the List field is displayed as a column in a folder’s list view, its values appear with the text and background colours you have chosen. To show the field as a column, see Configuring Folder Views and Columns.

Manage all custom metadata fields
Account administrators can review centrally defined custom metadata fields under Admin Tools → Metadata.
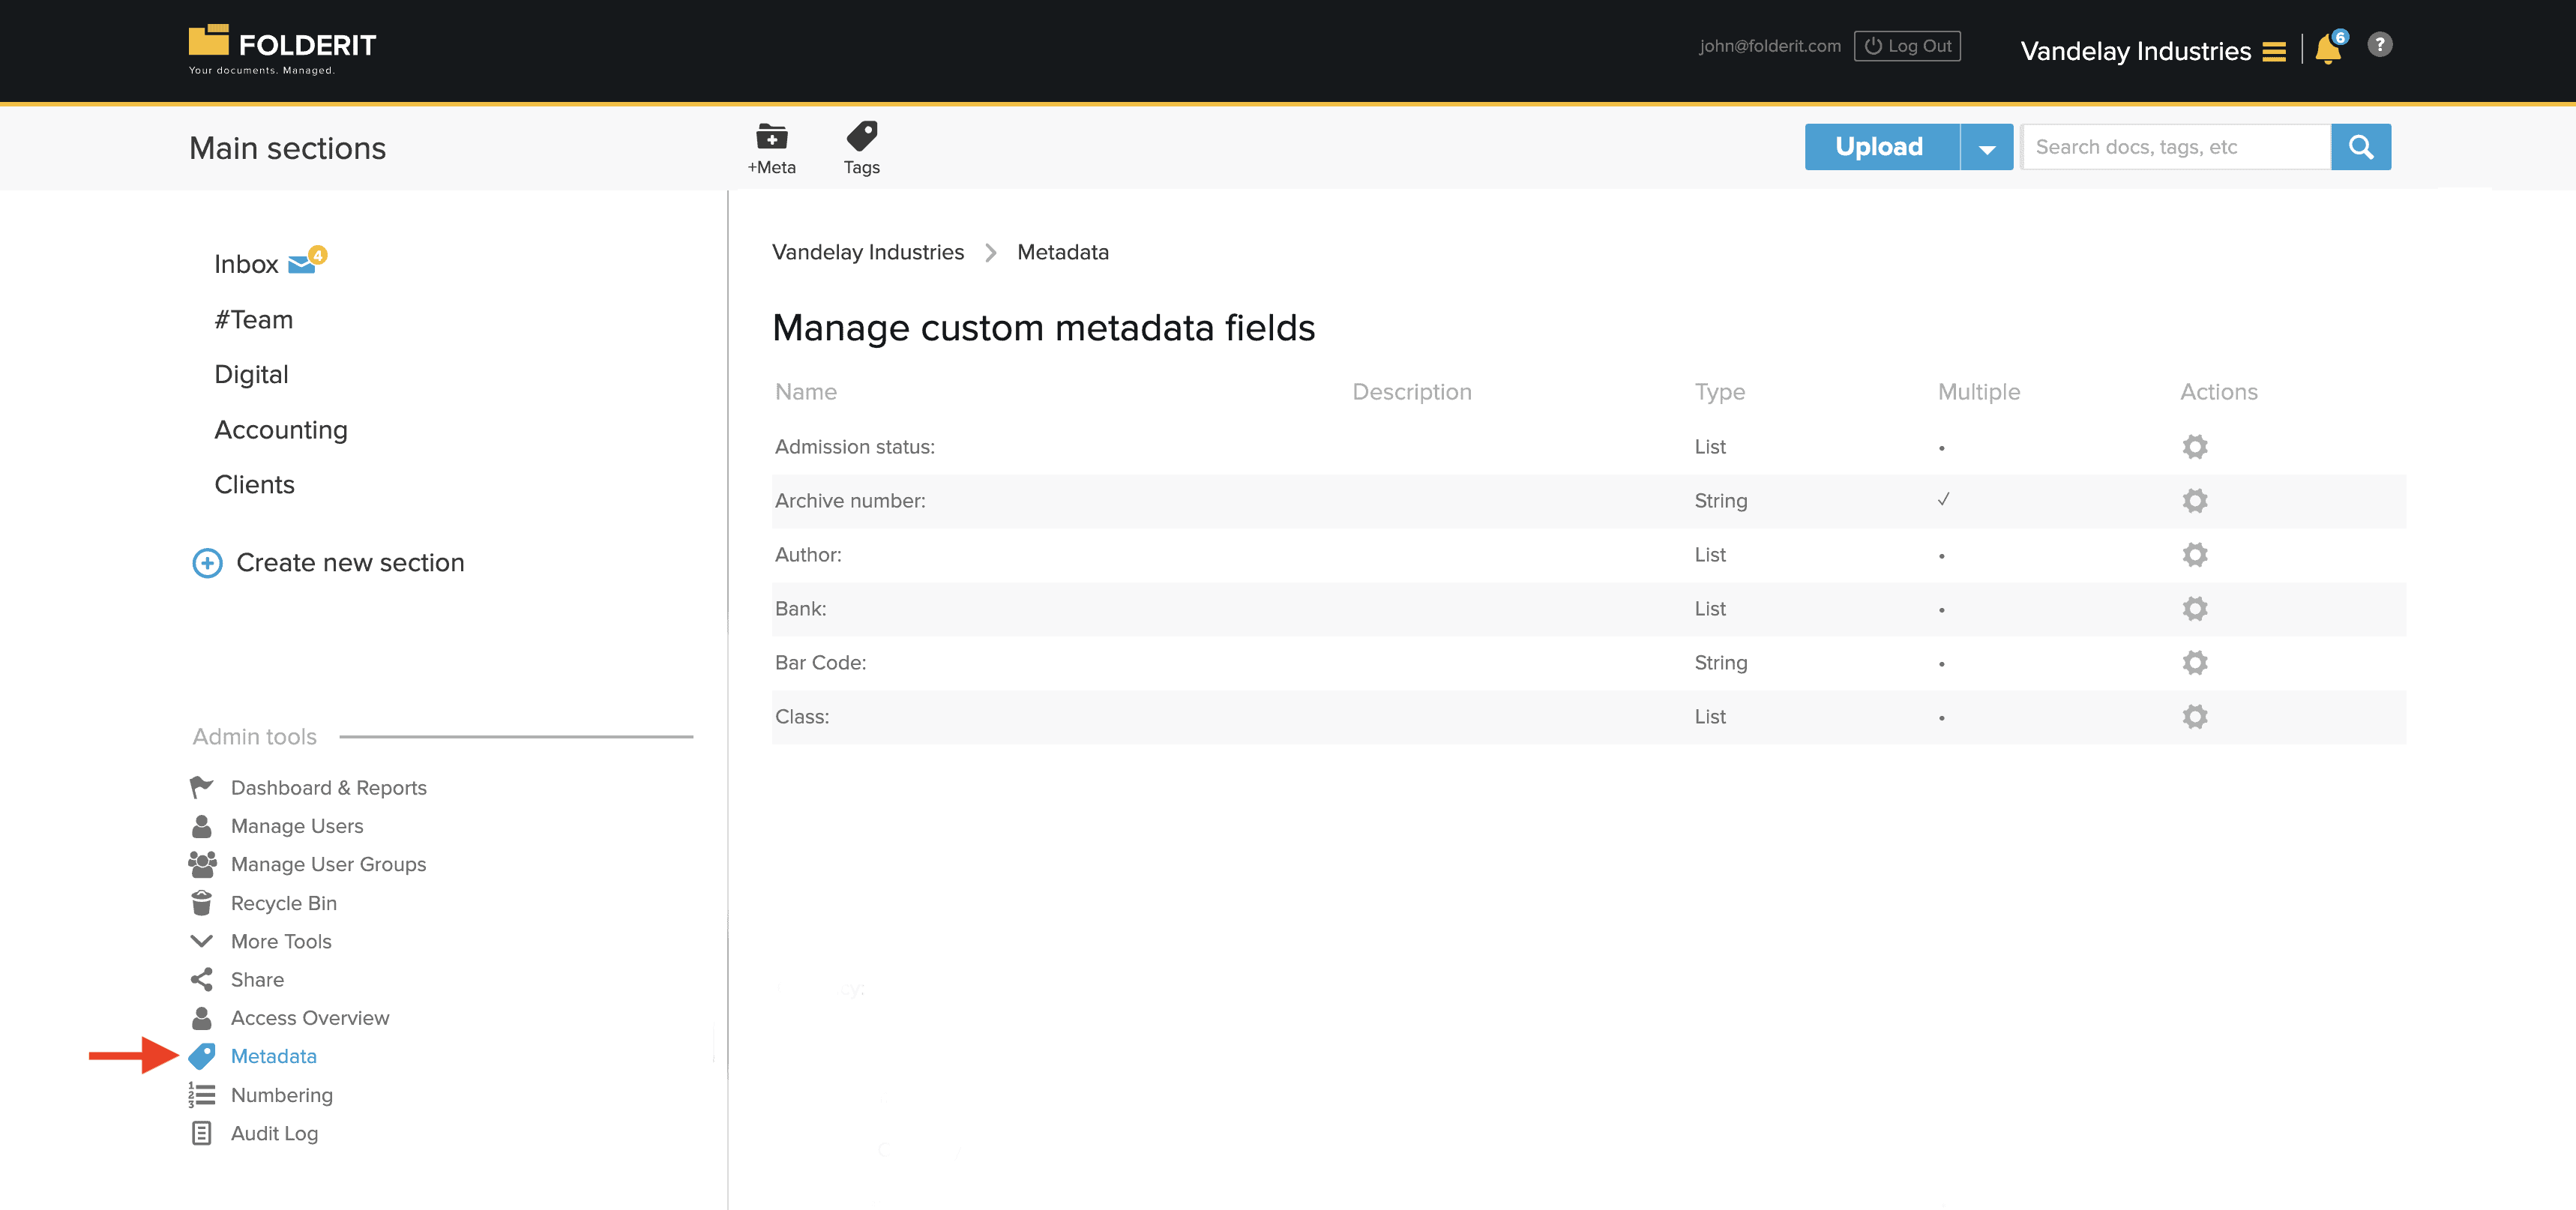
Click the gear icon beside a field to open its available actions.
See which forms use a metadata field
The Forms column in Admin tools → Metadata shows how many form templates use a shared metadata field.
- Go to Admin tools → Metadata and find the field.
- Click its number in the Forms column.
- The Forms using [field name] window lists the forms. Click an available form-name link to open its template editor.
Each linked form field can have its own visible label. For setup instructions, see sharing metadata across forms. To display the values together, see shared metadata in folder columns.
Edit a custom metadata field
Select Edit to change the field’s name or other available settings. For List fields, you can also set the text and background colours for each selectable value.
Changing the name of a centrally defined field also changes its displayed name everywhere the field is already used.
Delete a custom metadata field
Select Delete to remove the field from the system.
Important: deleting a custom metadata field removes it from every file, folder, external link, and folder template where it is currently used. Confirm that the field and its stored values are no longer needed before deleting it.
Enter values after setup
Once the fields are in place, follow Add and Edit Metadata to fill in values, complete required fields, and work through documents with Save & Next.