Setting Security Policy
If you want your team to follow stricter security practices — like using stronger passwords, enabling 2FA, setting IP restrictions, and requiring passwords to be changed regularly — go to the Security Policy page. There, you can configure all these rules and define the exact requirements for your team.
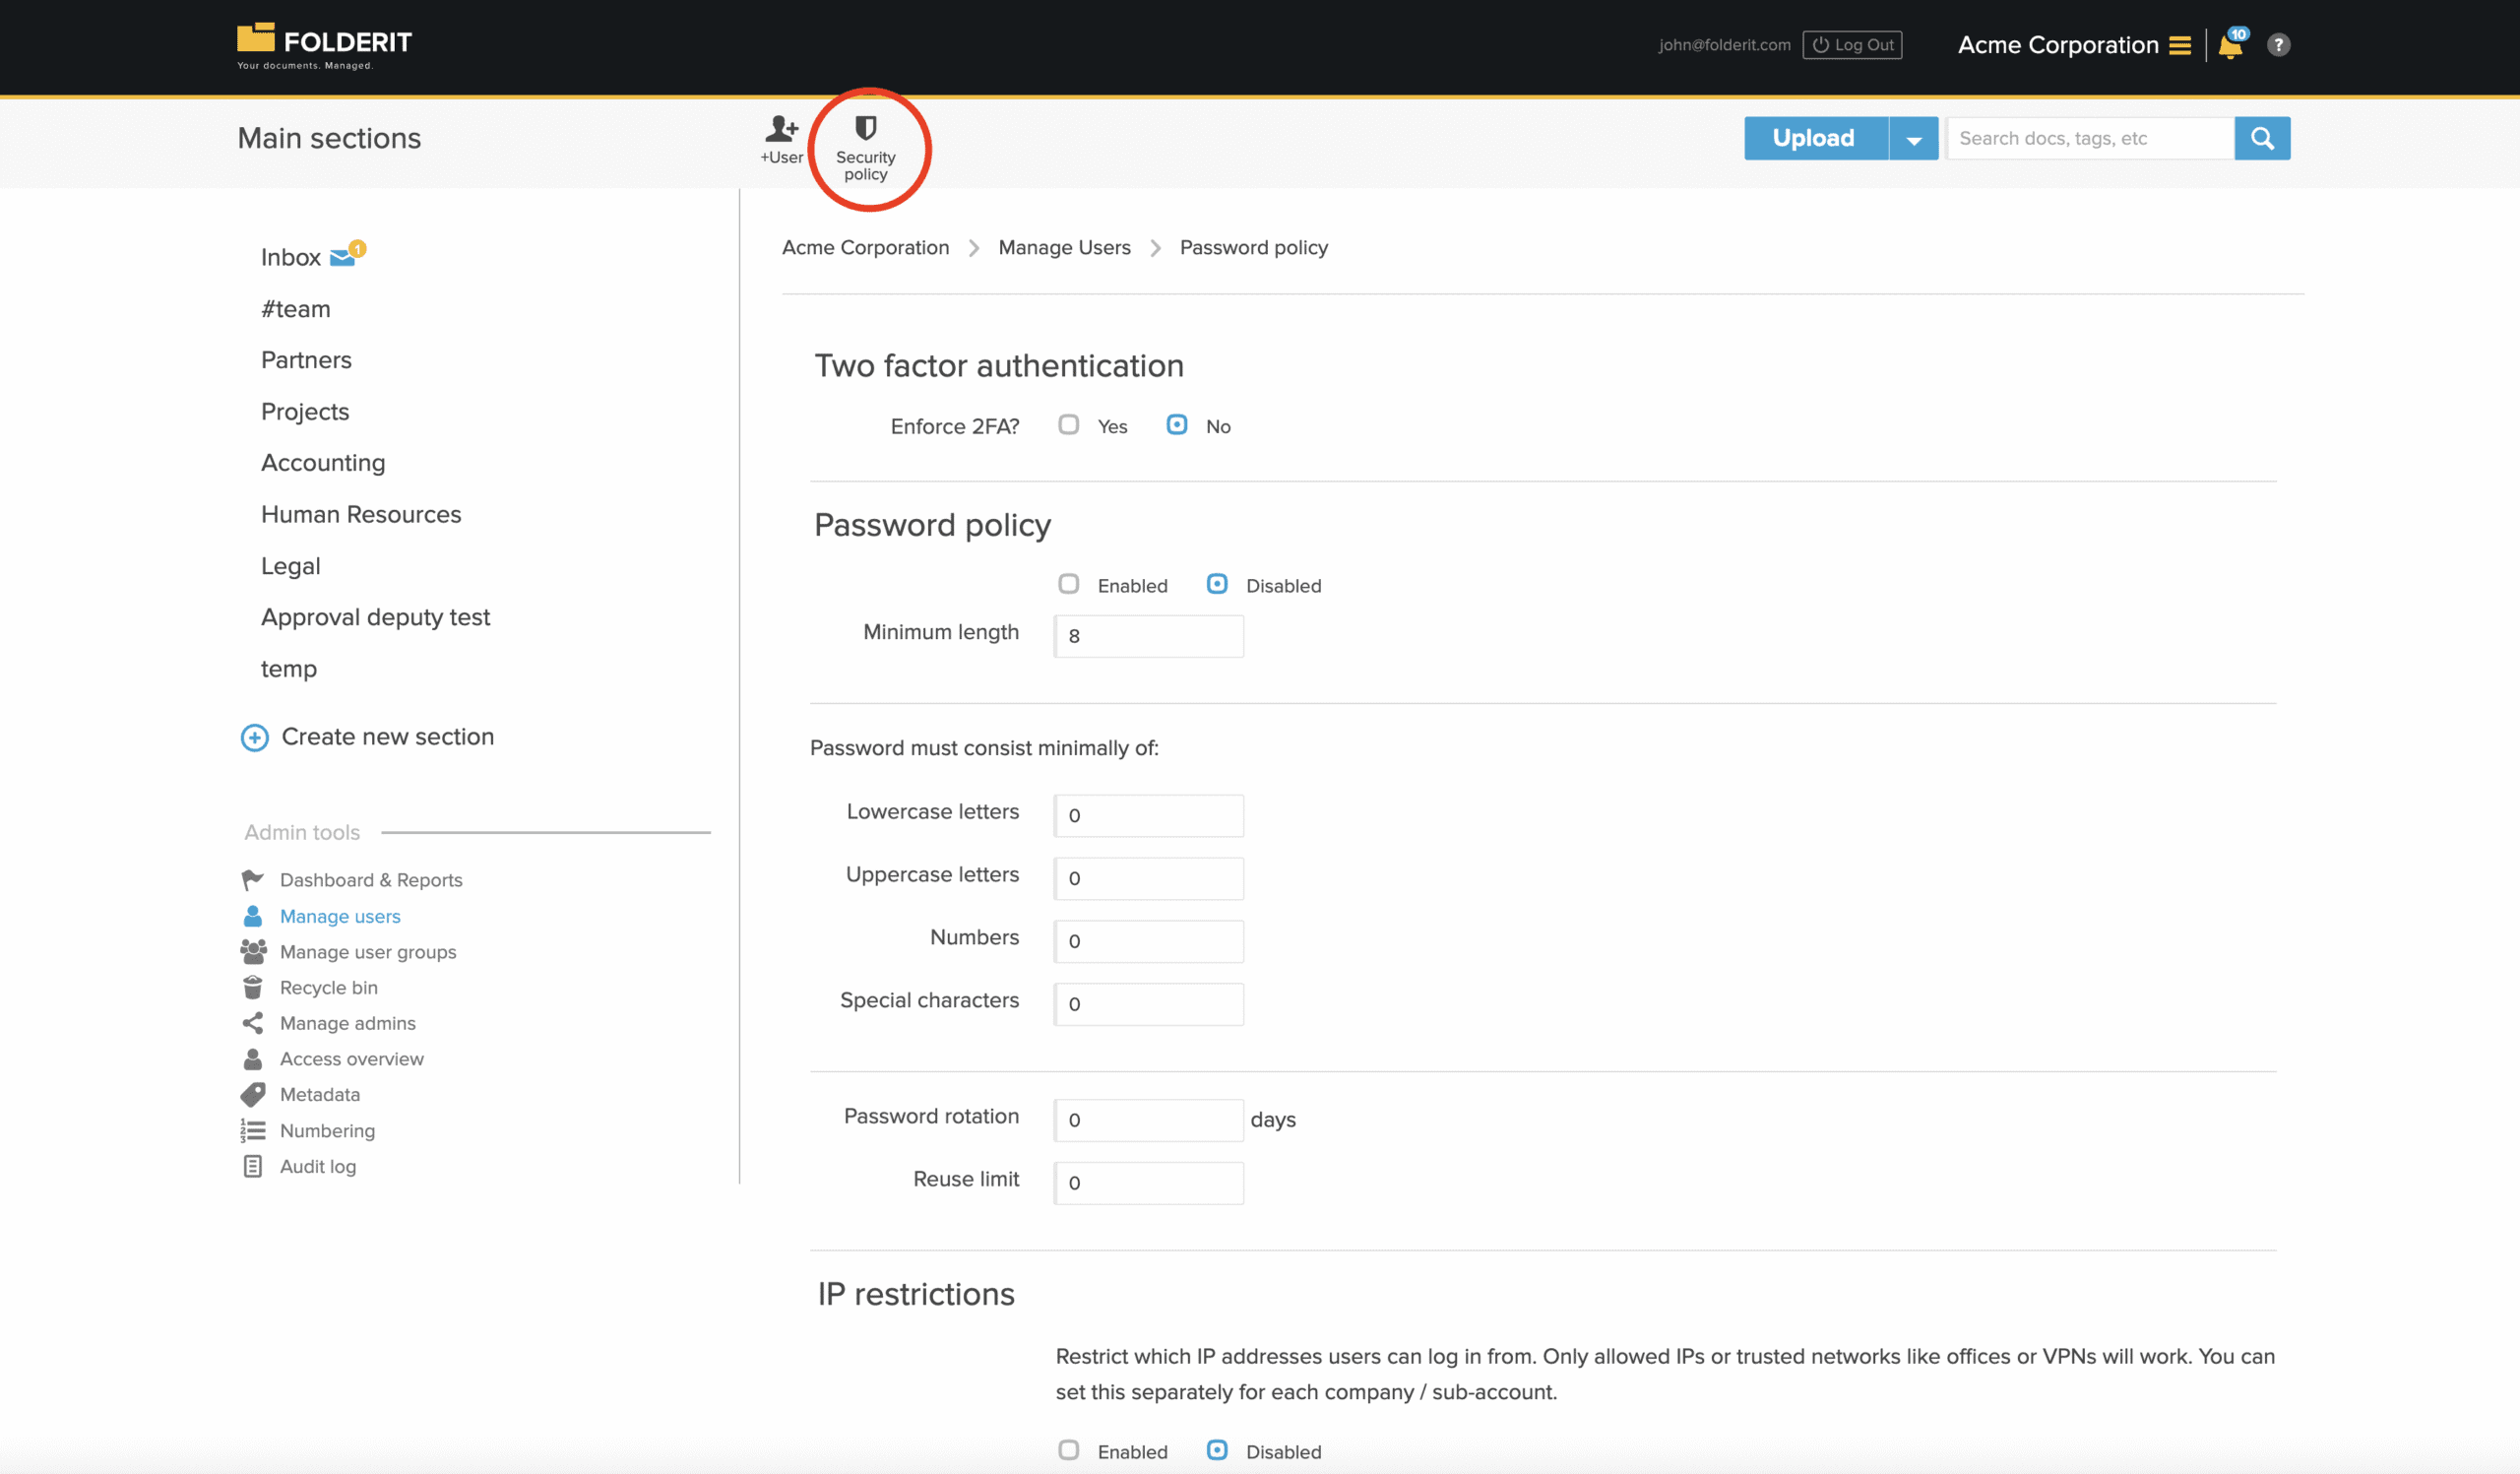
To view and use Security Policy settings, log in with your company’s Administrator user, click on ADMIN TOOLS > MANAGE USERS > SECURITY POLICY (a button on the toolbar). This is what you will see:
The changes you make will apply to all your Team members.
Here’s the description of the tools available:
Two factor authentication
- Enforce 2FA — If enabled, all users will need to set up and use 2-factor authentication on each login
Password policy
- Enabled / Disabled — toggles the effect of the policy On and Off
- Minimum length — the required number of characters in passwords
- Lowercase letters — the required number of lowercase letters (a, b, c, d, …) in passwords
- Uppercase letters — the required number of uppercase letters (A, B, C, D, …) in passwords
- Numbers — the required number of digits (1, 2, 3, 4, …) in passwords
- Special characters — the required number of special characters (!, “, #, @, …) in passwords
- Password rotation — the number of days after password creation when password change is required
- Reuse limit — defines how many previously used passwords the system remembers for each user, preventing them from reusing any of those
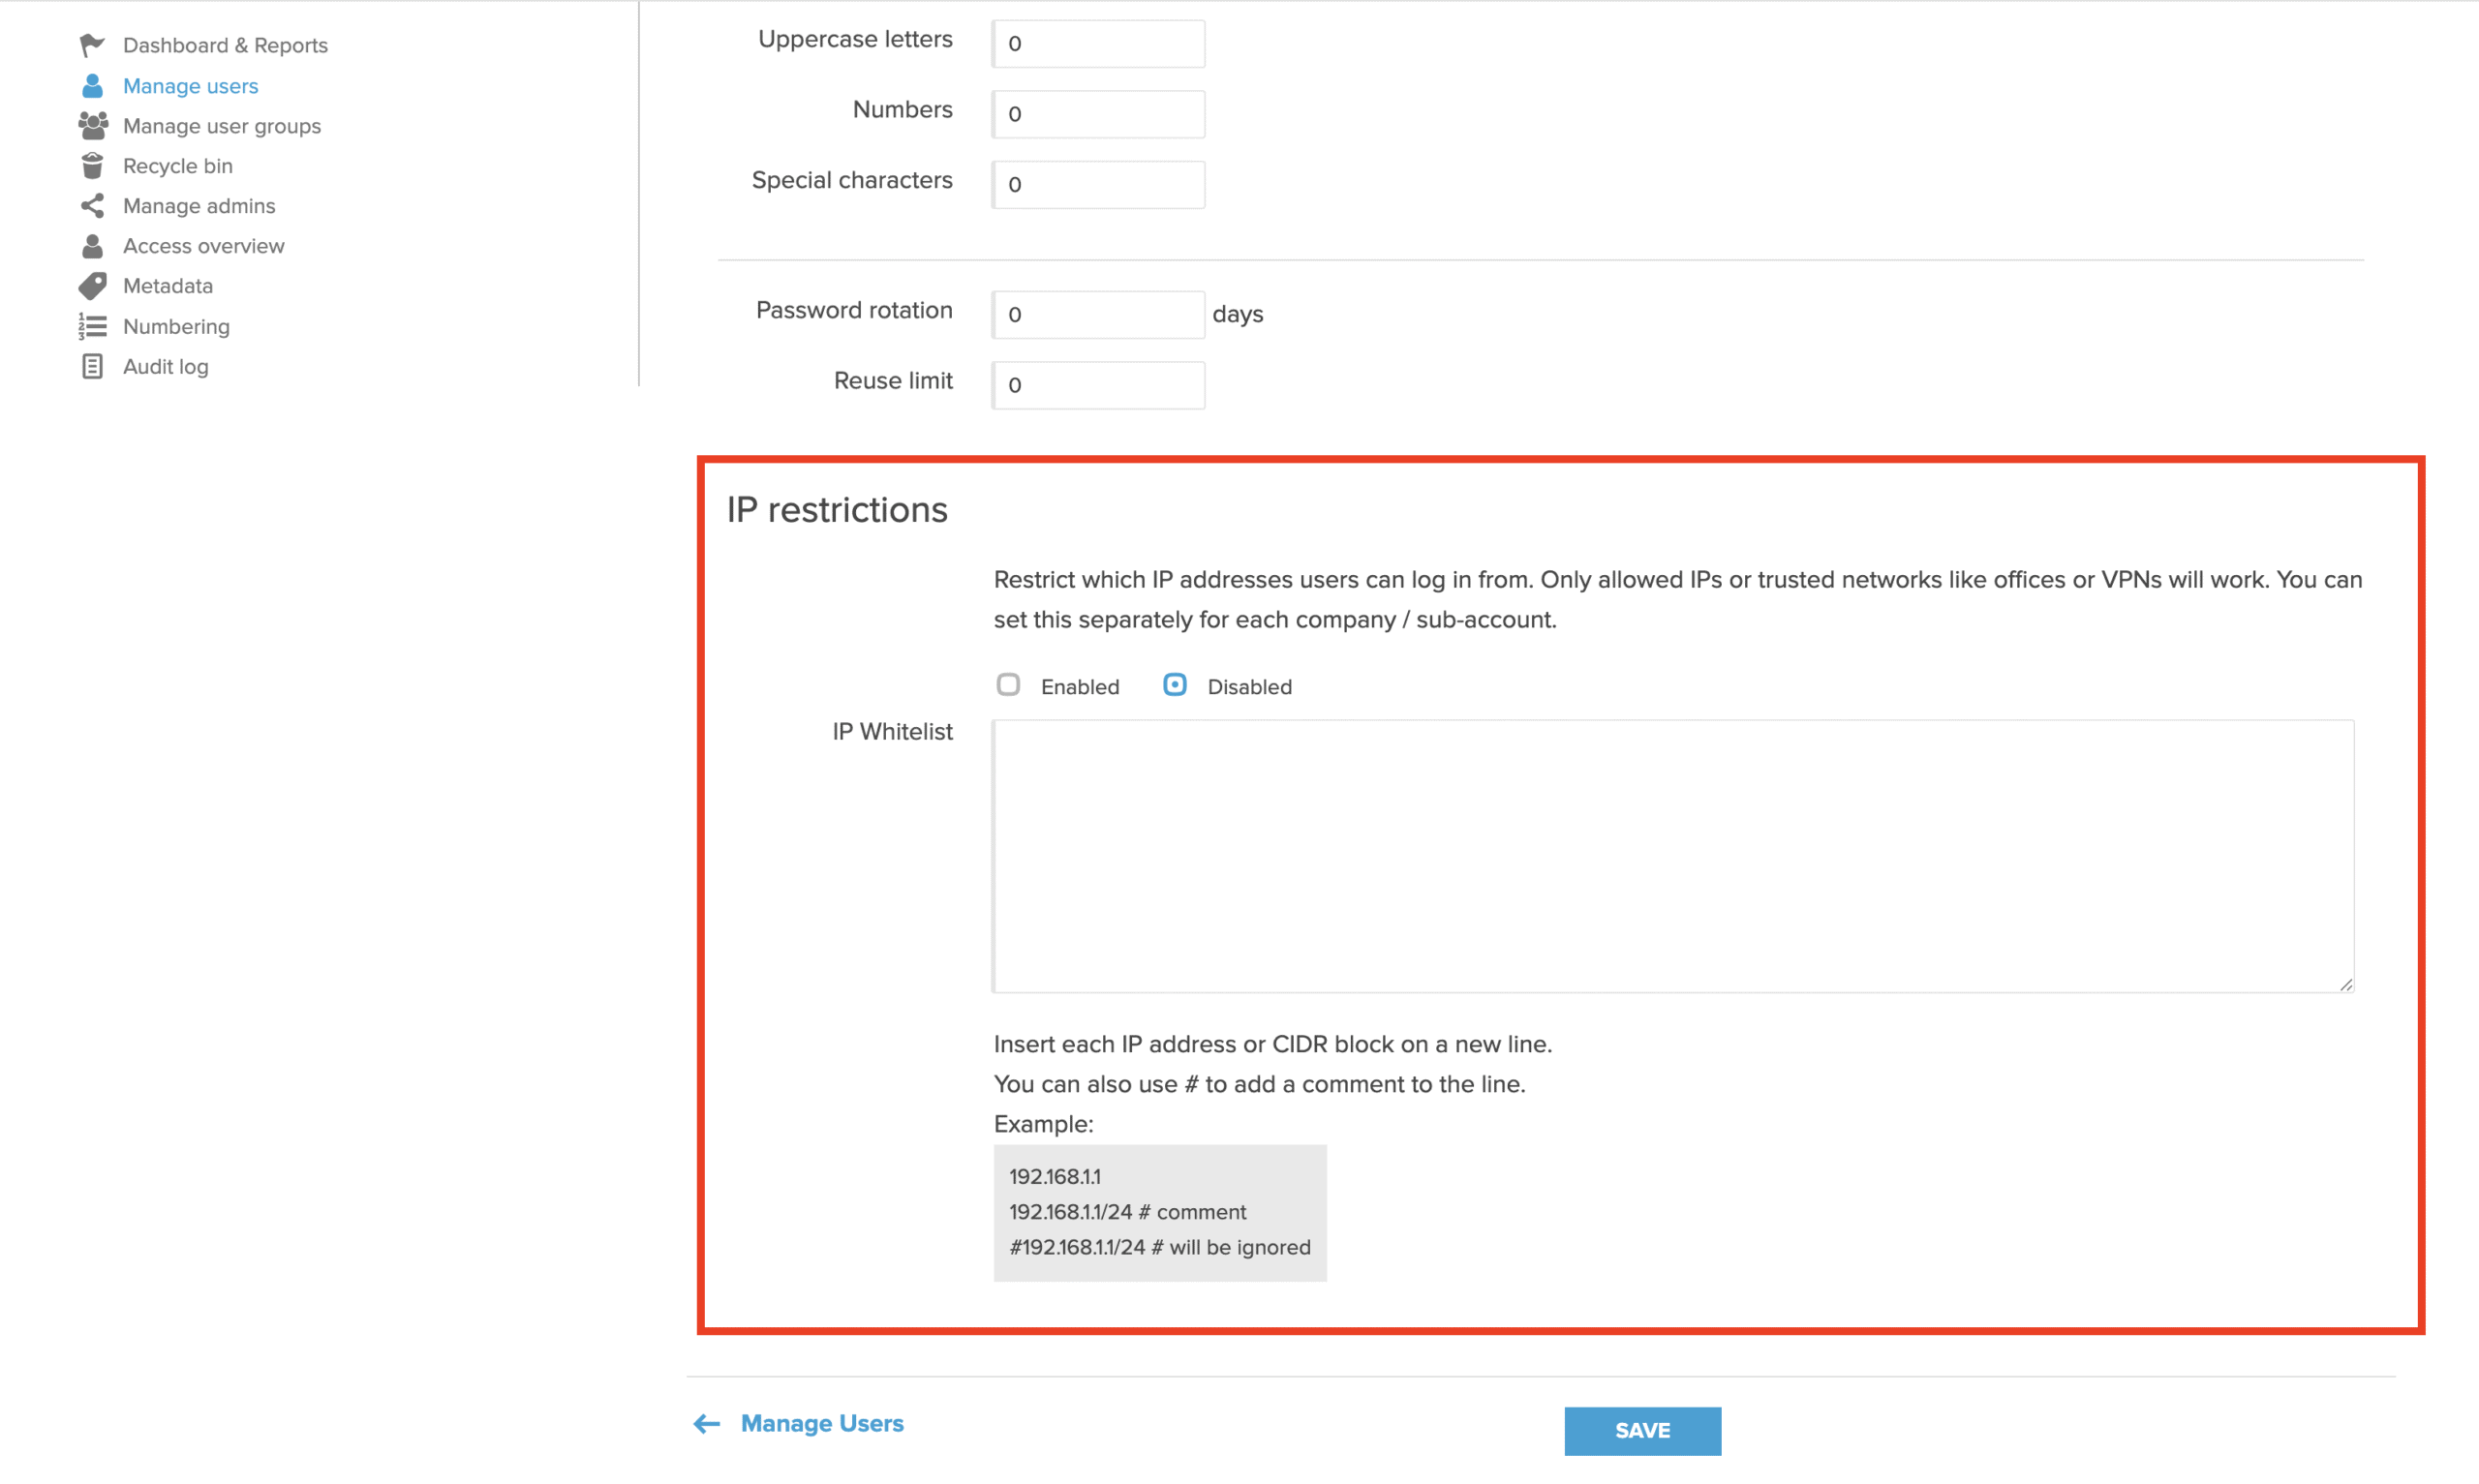
IP Restrictions
Restrict which IP addresses your users can log in from. This allows you to limit access only to trusted IPs or networks (like office or VPN connections).
- You can enable or disable IP restrictions for each company or sub-account.
- Add each allowed IP address or CIDR block on a separate line in the whitelist.
- You can include # to add comments next to an IP for your own notes.
Only the IPs listed will be able to log in — all other connections will be blocked.